People have always used blogs as a way to create and retain a loyal following, but it’s not always easy. We’ve got the best wordpress plugin for email subscription just waiting to be downloaded!
We know that getting people to subscribe to your blog is one of those things that seems simple in theory, but can be really difficult to make happen in reality. That’s why we’ve created the best wordpress plugin for email subscription—to help you easily get more subscribers, so you can focus on what you do best: Creating amazing content for your followers.
Table of Contents
Best WordPress Plugin For Email Subscription
We’ve listed both free and paid plugin options so that you can choose the best fit for your business.
1. WPForms
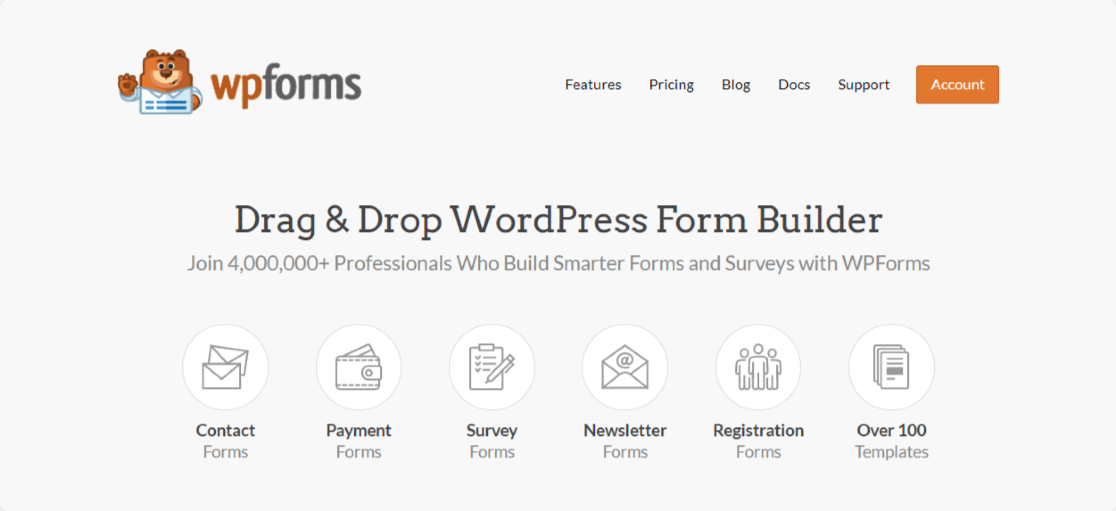
WPForms is the best form builder plugin for WordPress. With its easy drag and drop interface, you can create any online forms on your website.
This form plugin is completely compatible with popular email marketing services and provides plenty of powerful features that you can leverage to create flawlessly working email subscription forms.
With WPForms, you can create:
- Constant Contact subscribe forms with a checkbox for your visitors to join your WordPress newsletter
- Sendinblue forms to automate your email marketing and increase engagement
- Drip newsletter signup forms to automate the process of collecting leads with WordPress
- AWeber subscribe forms to build a high-quality email list
- Mailchimp subscribe forms to grow your email marketing list bigger
- GetResponse subscribe form to grow your email list.
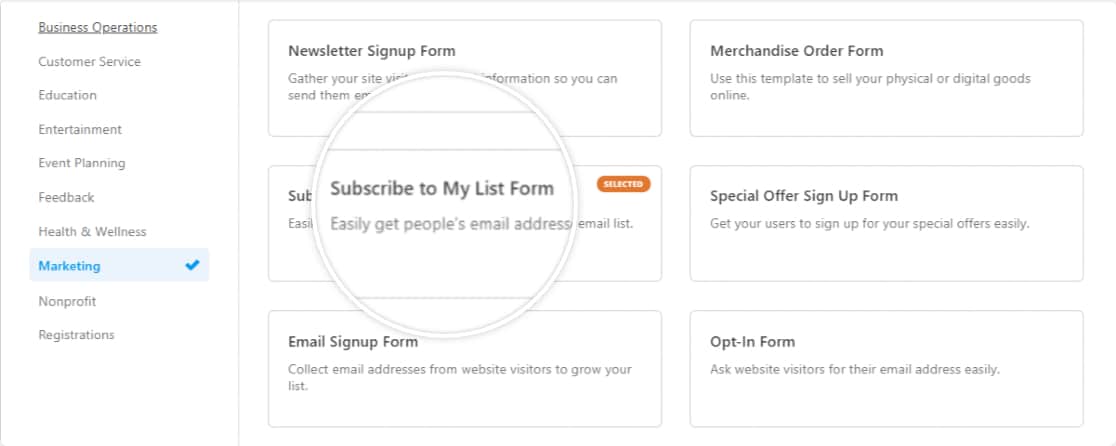
WPForms also has a huge pre-built template library that consists of 300+ ready-made form templates.
Apart from other marketing templates, this library includes a newsletter subscription form template. You can use this template if you don’t want to build your subscription form from scratch.
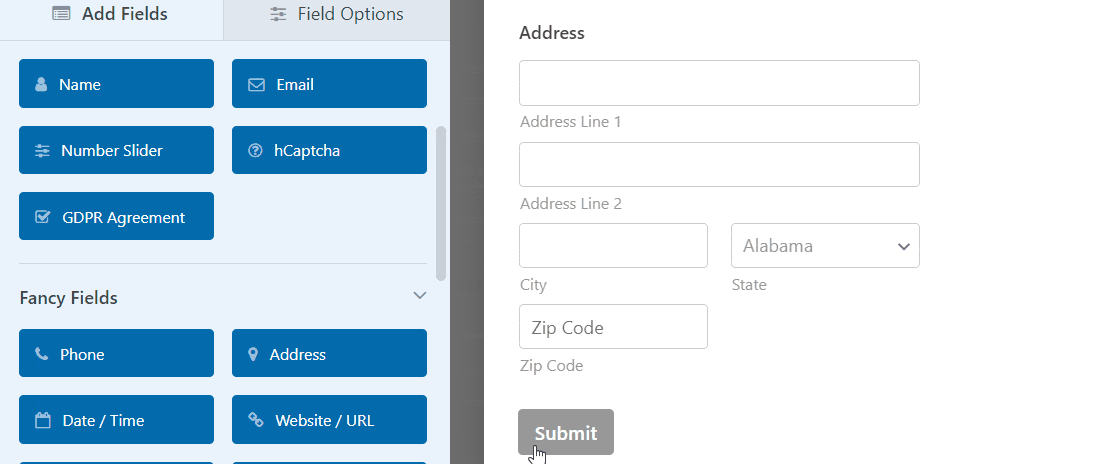
The drag and drop interface makes the form customizations super easy. You can add, remove, delete and modify the form field with just a single click.
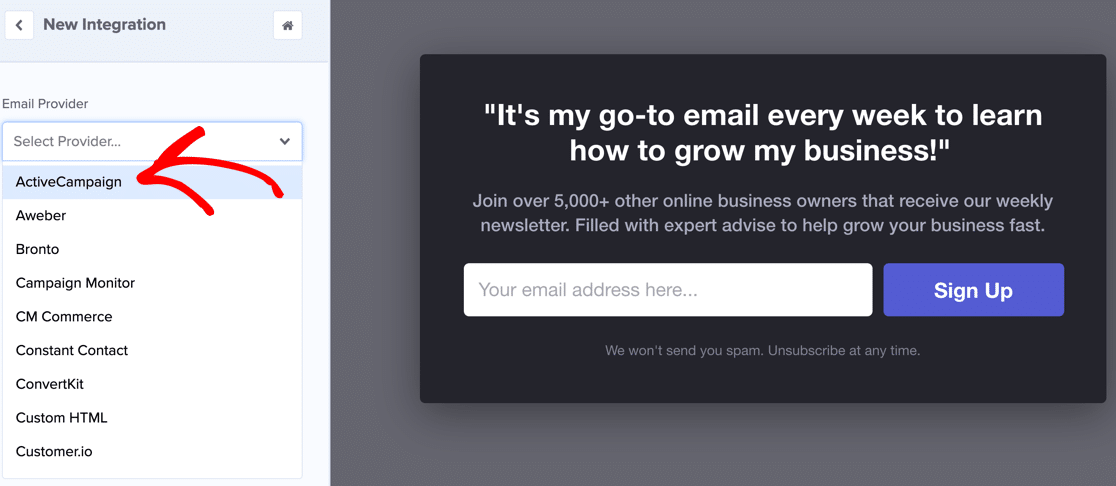
Once you create your form and integrate it with your email service provider, you can let your visitors choose which segment or group they want to join.
With the flexible embedding options of WPForms, you can easily display your forms in multiple locations, including your website’s sidebar.
WPForms’ email marketing tool integration includes plenty of features, and some of them allow you to:
- Add the user as a new contact to your mailing list
- Unsubscribe an existing contact from the mailing list
- Archive an existing contact from your mailing list
- And permanently delete the contact from your mailing list.
Furthermore, you can view a detailed report of your form submissions’ and track lead sources for your website.
Features:
- Easy drag and drop form builder
- Ready-made subscribe form templates
- Popular email marketing tools integrations
- Receive payments via integrations with PayPal, Square, Authorize.net, and Stripe
- Powerful anti-spam features such as reCaptcha, hCaptcha, and custom Captcha
- Mark subscriber as VIP
- Double opt-in functionality
- Notified users if they are already subscribed to your list
- Conditional logic
- And more…
Pricing: WPForms comes with both lite and pro versions. The free version includes Constant Contact integration. To integrate other email marketing addons, you need to upgrade to higher paid plans of WPForms.
2. OptinMonster

OptinMonster is hands down the best lead generation plugin for WordPress. It helps you attract visitors, increase page views, collect email addresses, and generate more revenue by displaying exciting marketing popups and opt-in forms.
Even better, OptinMonster supports all popular email marketing tools such as Mailchimp, Sendinblue, AWeber.
With the OptinMonster plugin, you can create interactive popup campaigns, email subscription forms, floating bars, notification bars, and other types of campaigns that encourage your visitors to take action—all that without writing a single line of code.
For more info, check out our detailed review of the OptinMonster plugin.
Features:
- Easy drag and drop builder
- A/B testing
- 50+ pre-built email templates help you get started in a few clicks
- Flexibility to add animation and sound effects to create eye-catchy email campaigns
- Geolocation feature to target visitors based on their physical location
- Display an attention-grabbing exit-intent popup to the visitor that immediately leaves your website
- Advanced targeting rules to display campaigns to the right audience
- And more…
Pricing: OptionMonster offers both lite and pro versions. With its Lite version, you can make email newsletter popups for free. And paid plans start at $14/ mo.
3. RafflePress

RafflePress is the best giveaway WordPress plugin. You can create powerful giveaways and grow your email list without struggling with any HTML code.
You can host giveaways on your WordPress websites and set entry actions for your users to enter the contest. RafflePress includes multiple content entry actions that you can choose from.
Including social media channels, you can also set a Newsletter Subscribe entry to build your mailing list. And to capture more leads, you can give participants multiple entries for subscribing to your newsletter.

This is one of the prominent ways to get more leads and build a powerful email list.
Also, RafflePress provides seamless integration with popular email marketing services so that you can build and manage your leads with your preferred tool.
RafflePress is not just a giveaways plugin; you can do more with its advanced and powerful features. Check more details in our in-depth review of RafflePress.
Features:
- Easy drag and drop builder
- Create customized giveaways
- Compatible with email marketing tools such as Constant Contact, AWeber, Mailchimp, ActiveCampaign, and more.
- Pre-built giveaway templates
- Display opt-in confirmation checkbox
- Mobile-friendly
- And more…
Pricing: Includes both free and pro versions. The paid plan starts at $49/ year.
4. SeedProd

SeedProd is the number #1 landing page builder for WordPress. It lets you create professional-looking and high-converting landing pages in just a few clicks. No coding is required!
With the SeedProd page builder plugin, you can create:
- Coming soon pages
- Maintenance mode pages
- Sales pages
- Thank you pages
- Login pages
- Webinar pages
- And more…
If you don’t want to start creating pages from a blank canvas, you can simply use the pre-built landing page templates of SeedProd. These templates are customizable; you can change the look and design according to your brand.

SeedProd works smoothly with WPForms and OptinMonster. You can embed email subscription forms and optin campaigns directly on your landing pages to generate more leads for your website.
Is SeedProd really worth it? Check out our detailed SeedProd Review to know more!
Features:
- Drag and drop builder
- Pre-built landing page templates
- Integrated with AWeber, Campaign Monitor, Constant Contact, Drip, and more
- Landing page-specific blocks
- Live previews
- Responsive and mobile ready
- And more…
Pricing: Starts at $39.50/year.
5. Newsletter

Newsletter is a popular plugin available to create, send and manage newsletters directly from the WordPress dashboard.
The Newsletter plugin has an interactive visual composer that opens in your WordPress dashboard. You can drag and drop components and build beautiful email newsletters.
The Newsletter plugin includes both free and pro features. With its free version, you can create a basic newsletter and get few reporting features. However, its pro version is loaded with more advanced features.
With this plugin, you can add a subscription form or popup to your WordPress site to capture leads. You can fragment your email list and automate your blog newsletter.
Newsletter completely supports SMTP services, so if you face difficulty sending newsletters directly from WordPress, an SMTP plugin will help with that. Check out this article to learn how to fix The Newsletter Plugin not sending an email.
Features:
- Easy-to-use Drag and drop composer
- Add unlimited subscribers
- Send unlimited newsletters
- Compatible with tools like Amazon SES, SendGrid, Mailgun
- Multi-list targeting
- Built-in reporting tool
- Automate newsletters
- And more…
Pricing: Starts at $69/year.
how to add email subscription form in wordpress
1. Set up the Sendinblue WordPress plugin
Your first task is to install Sendinblue’s free WordPress email subscription plugin on your website. This will allow you to create signup forms directly from your dashboard and integrate them into your site content.
To install the plugin:
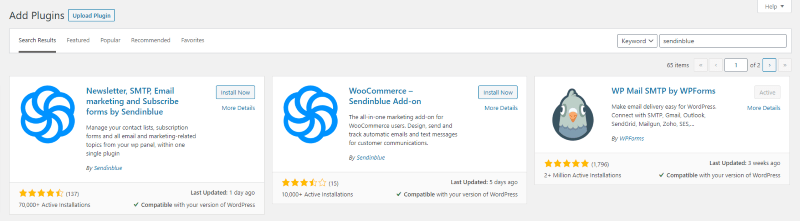
- Log into your WordPress dashboard as an administrator.
- Go to “Plugins” in the sidebar menu, then “Add New”.
- Search “Sendinblue” to find the plugin “Newsletter, SMTP, Email marketing and Subscribe forms by Sendinblue”.
- Click “Install Now”, then “Activate”.
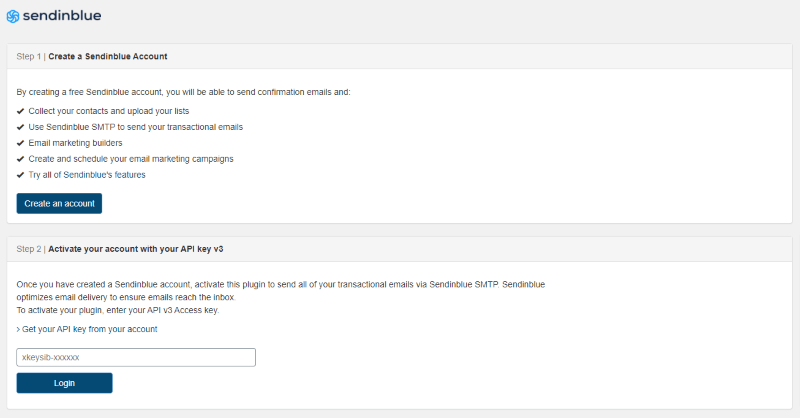
To finish the setup, click on the Sendinblue plugin tab that will now have appeared in the sidebar menu of your WordPress dashboard.
Here you can click the button to create a free account with Sendinblue. Or, if you already have one, go straight to the second step — “Activate your account with your API key v3”. Follow these instructions to find your API key, then enter the key and click “Login”.
Now you’ve connected the plugin to your Sendinblue account, subscriber details collected via your forms will sync with your chosen Sendinblue contact lists.
2. Create your contact list in Sendinblue
Before you can start collecting email subscriptions on your WordPress site, you need to create the list you want to add contacts to.
To do this, go to the “Contacts” tab in your Sendinblue account, select “Lists” from the sidebar and click the “Add a new list” button.

Next, give your list a name and click the button to create your list.

Your lists will automatically have columns, called contact attributes, for data like the contact name and email. If you plan to collect other information from subscribers when they sign up, you can add more attributes of your choice. For example, you might add an attribute for “Country” if you want to know a subscriber’s location.
Any attributes you set up will then be available to use as fields in your WordPress email signup forms.
This video explains how to add new attributes for your Sendinblue lists:data:image/gif;base64,R0lGODlhAQABAAAAACH5BAEKAAEALAAAAAABAAEAAAICTAEAOw==
3. Create your email subscription form in WordPress
Now for the most important step — creating an effective form that will convert your website visitors into subscribers.
Sendinblue’s plugin offers an easy-to-use tool for building your own custom forms directly from your WordPress dashboard. To get started, go to “Forms” and click “Add New Form”.
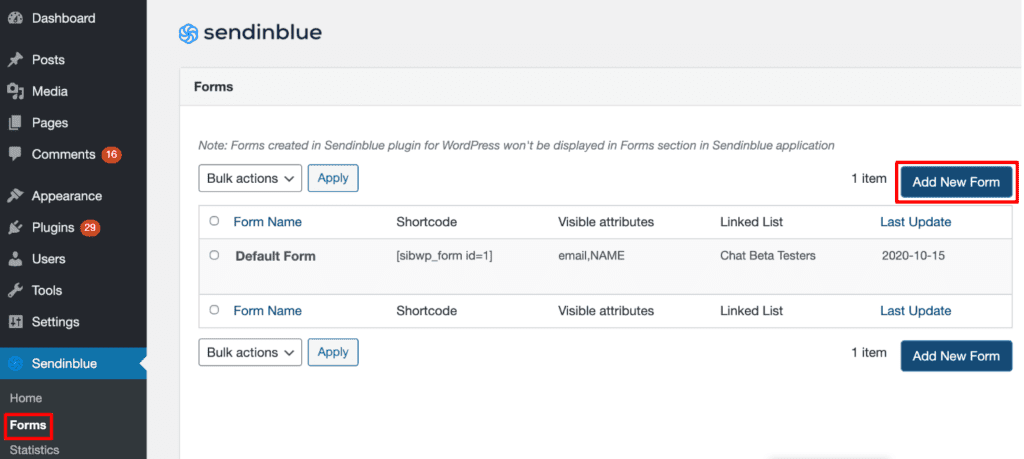
This will take you to the form builder where you can give your form a name before editing the setup and design.
The builder includes a HTML editor for customizing your form. But, if you’re not familiar with code, you can easily add elements using the options below the HTML editor. The preview box then lets you see any edits in real time.
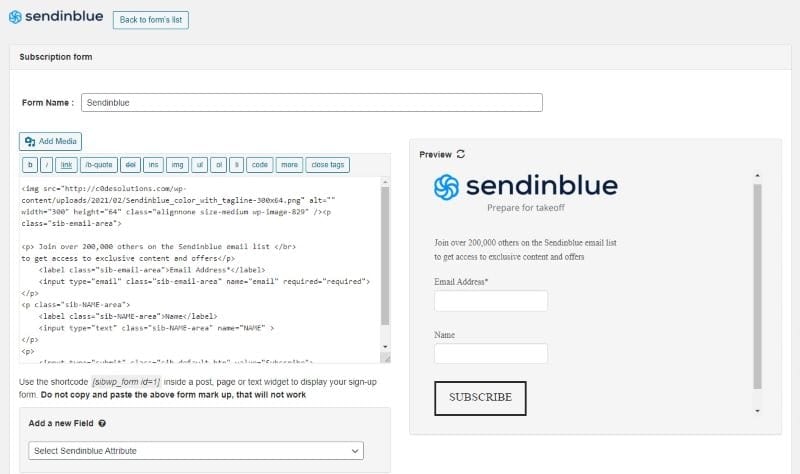
For the look of your form you have two options — either use the default styling that depends on your WordPress theme or use custom CSS. Select your preferred method in the “Form Style” section.
Adding fields to your form
When creating your form content, you need to decide what fields you want to use for collecting subscriber details.
By default your form will include fields for name and email but you might want to add more depending on your needs. For example, collecting data like gender or location can help you personalize your email campaigns for subscribers.
However, your priority should be to keep your form as simple as possible. Avoid asking for too much from the outset, otherwise you risk putting people off signing up at all. It’s also a good idea to only make essential information like email address mandatory.
To add a field to your form, select the relevant contact attribute from the dropdown in the “Add a new field” section. Options will then appear for editing the field text, as well as choosing if a field should be required. Once you’ve completed the field information, click the “Add to form” button.
Other customization options
Aside from the form fields, you’ll also find sections for adding other elements including:
- Multi-list subscription
This lets subscribers select their interests or preferences and be added to a corresponding email list.
- Captcha
This will add captcha protection to your form to prevent spambot signups. For more detail, see our tutorial on setting up captcha for your forms.
- Compliance note and term acceptance
This lets you include details of your privacy policy and a checkbox for subscribers to agree to your terms.
4. Complete the form setup
Once you’re happy with the form design, you need to decide what happens after a signup occurs.
First, select one or more lists you want to add subscriber details to. You can choose from your available lists in the “Linked lists” section under “Sign up process”.
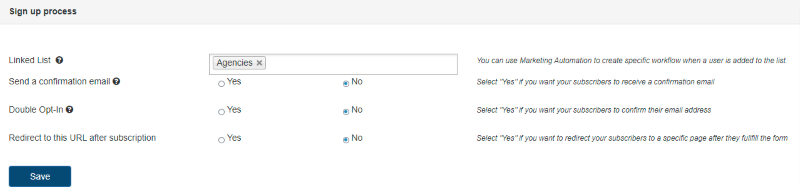
Next, you have the option to customize what happens on the user side after subscription.
Setting up the post-signup journey
Creating a smooth experience for new subscribers will help make a good first impression. And Sendinblue’s WordPress forms tool offers ways to improve the process.
The options available are under “Sign up process” and include:
- Send a confirmation email
This will trigger an email to each subscriber letting them know they’re signed up to your list. Sendinblue provides a default template for this message, or you can create your own in the “Templates” section of your Sendinblue account. By customizing your confirmation email, you can introduce subscribers to your brand before they start receiving your regular emails.
- Double opt-in
This adds an extra step to the signup process where subscribers must click a link in your confirmation email to complete their subscription. Double opt-in gives contacts the chance to confirm they wanted to sign up, while also preventing invalid addresses. As with the standard confirmation email, Sendinblue offers a default template or you can use your own. For more detail, check out our guide to double opt-in emails.
- Redirect to URL
As well as sending a confirmation email, you can also take subscribers to a webpage after they fill out your form. To set this up, simply paste the URL of your chosen page, such as a dedicated success or thank you page you’ve created.
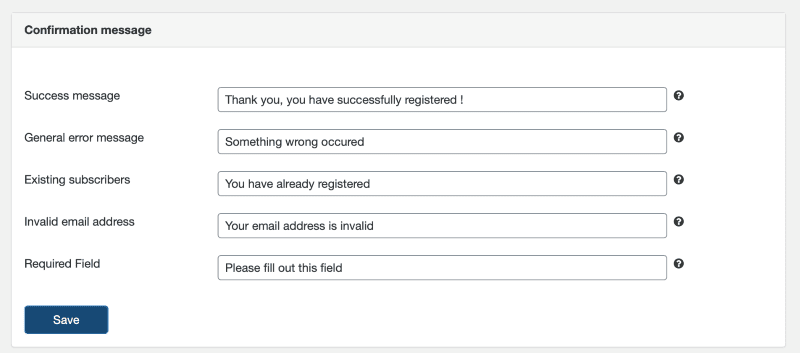
You can also edit the text for success and error messages on the form itself in the “Confirmation message” settings.
5. Add your email subscription form to your WordPress site
After putting time into creating your form you’ll want to make sure as many of your website visitors as possible see it. Here are some effective places for maximum visibility:
- Your Homepage
- Your site’s header or footer
- Blog posts, either within articles or as a sidebar
- The Contact and About pages
- A dedicated landing page
With Sendinblue’s WordPress email subscription plugin, it’s quick and easy to add your form in different places across your website. Below you’ll find instructions for the two possible methods.
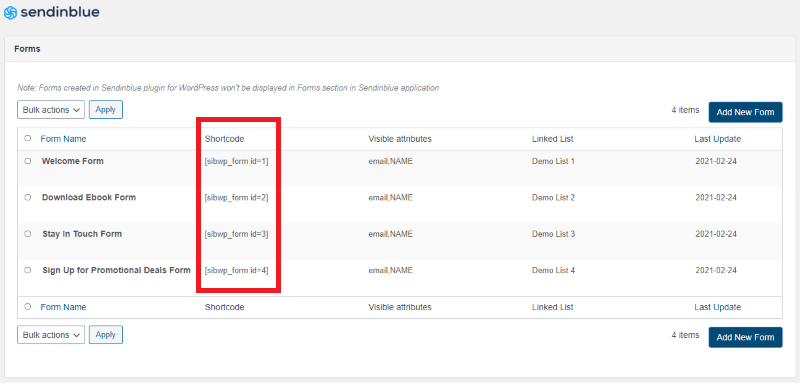
Add your form using a shortcode
If you want to add your form to individual pages or posts on your site, you can use its shortcode.
To find the shortcode for your form, go to the “Forms” tab of the Sendinblue plugin. There you’ll see a list of all your created forms along with their shortcodes. Copy the relevant code then paste it into the WordPress editor for your chosen post or page where you want the form to appear.
Conclusion
Let us know your thoughts in the comment section below.
Check out other publications to gain access to more digital resources if you are just starting out with Flux Resource.
Also contact us today to optimize your business(s)/Brand(s) for Search Engines