As you may have noticed, we’ve been writing a lot about YouTube lately. We’re on a mission to help you grow your channel and make more money, so we’re dedicating this month to sharing with you some of the best tools for doing just that!
Today, we’re going to talk about some of the essential tools for YouTubers. These are the tools that every YouTuber should have in their toolkit.
You probably know what most of these are already: Premiere Pro, Audacity, and Camtasia are all great video editors that allow you to edit your videos and mix soundtracks together. But there are other tools out there that can help you grow your channel faster than ever before.
Here’s our list of essential tools for YouTubers:
Essential Tools For Youtubers
Since YouTube has become a competitive space market, you are required to put more effort into producing visually great quality videos to succeed as a beginner.
Not only will it help you gain a substantial number of views but also a good number of subscribers. Having unique and great content is not an assurance that you will succeed; if you do not focus on producing a visually compelling video with quality music, then you have no chance.
Ok, my guess is you’ve got that one successful and established YouTuber that you admire a lot and you want to be like him/her. But you should know that most of them do hire professional camera operators and video editors or use a wide array of classy equipment for their video production.
So if you are just starting or aiming to enhance what you already have, but with a basic set-up as the key, then you need not go that far. The main thing you need to consider is getting quality equipment. Always remember that not even SEO or good content can make up for a poor quality video.
So due to the fierce competition, no one will have time for bad sound, lighting, and editing. They say time is money; there is no need to toss video after video if it isn’t working. Equipment is expensive, and so is your time.
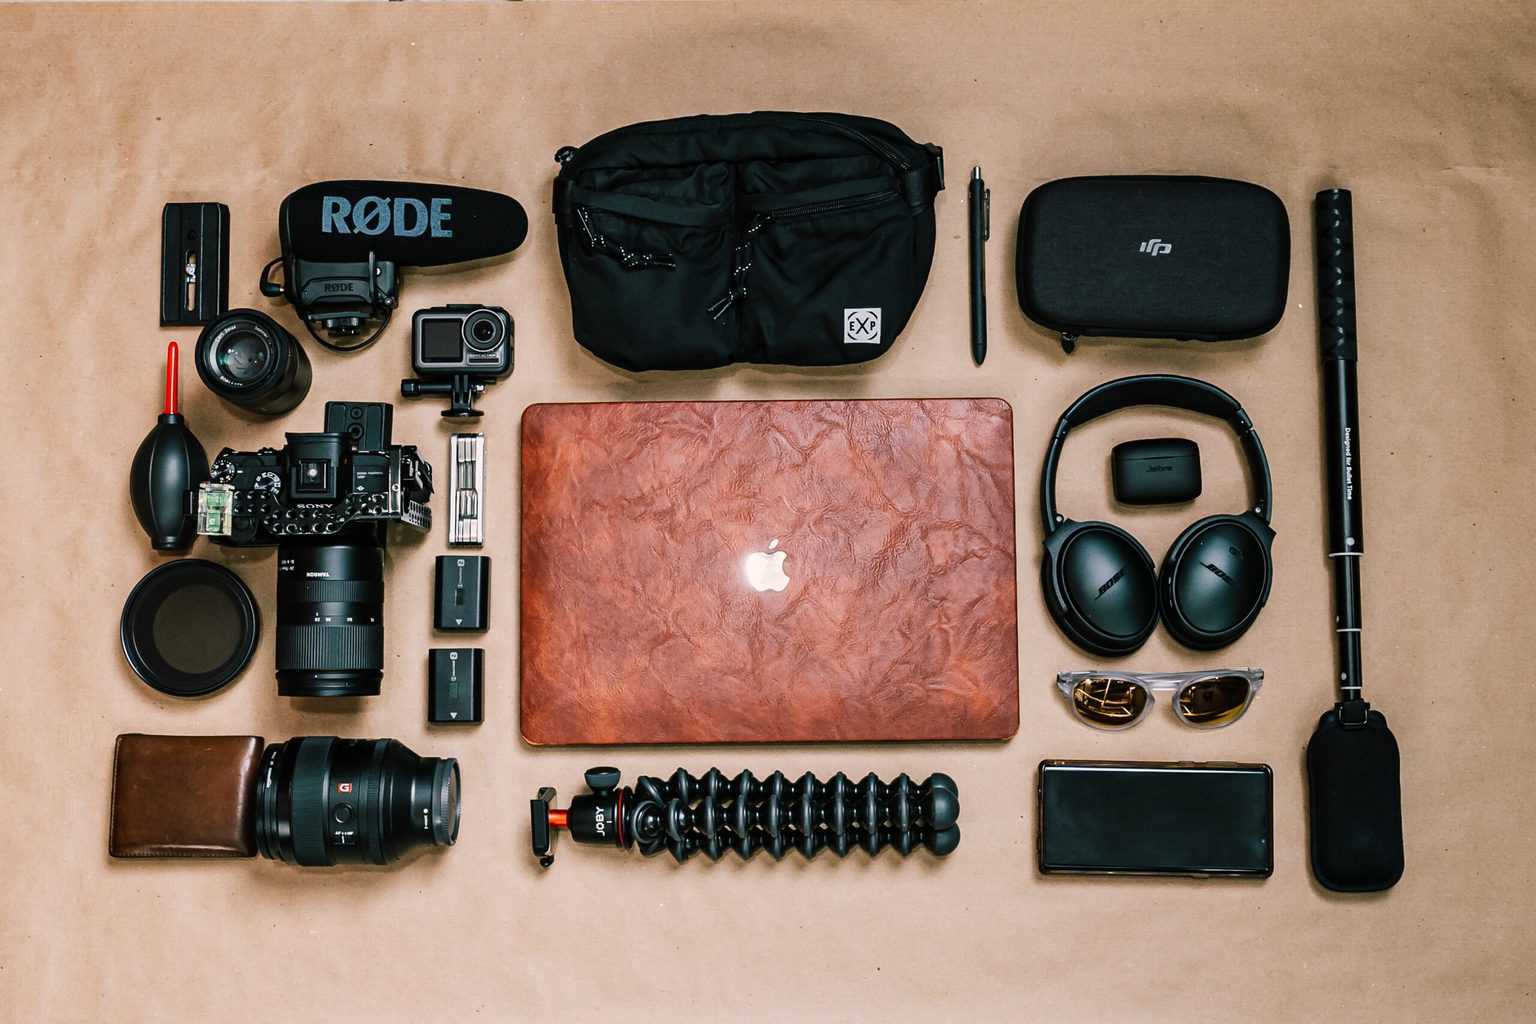
Therefore, here are the Top 7 pieces of equipment and tools you need when starting on YouTube channel.
1. Camera
For someone serious about growing their YouTube channel, the high-quality camera will be the first and critical equipment to procure. Being essential equipment you do not need to go for the expensive DSLR cameras, all you need is a good camera that can record a high quality (at least 1080 p) video.
The kind of content you will be creating will define the type of camera to acquire. So, if you are starting quality webcams and camcorders plus good edit will service you well until when you will be able to upgrade and invest in expensive DSLRs.
Here are some of the best camcorders and webcams you can use.
Webcam
• Logitech C922 Pro Stream – which supports up to 760 px and 60 fps streaming and resolution of 1080p only at $73.35.
• Razer Kiyo – with a resolution of 1080p only at $59.95.
Camcorder
• Sony HDR-CX405 priced at around $250.
• Panasonic HC-V180K which is priced at around $180.
Also, you can start with a phone and webcam, and then evolve if you can’t afford an expensive camera for a start.
2. External microphone
For people to hear and understand what you are saying, you will need a good microphone. Sound is the second most crucial thing when it comes to YouTube content, and excellent audio will keep your viewers attentive to what you are demonstrating, showing, and saying in every video.
Here are some of the best microphones from the most to the least expensive.
• Heil PR-40 – for studio quality audio at $327.95.
• Samson CO1U – It is a USB mic that suits the starts at $79.95.
• Audio Technica ATR2100 – Best voice-over microphone at $65.
• Audio-Technica ATR2100USB – Both XLR and USB microphone at $59.95.
• Logitech Clearchat Headset – Great for beginners, USB mic at $29.99.
There are other microphones but quite expensive, for example, Condenser Microphones, Shotgun microphones, Lapel microphones which are $100 and above.
3. Soft Boxes
If you value a beautiful ambiance in your video, then it’s recommended that you get softboxes. Acquiring softboxes is an inexpensive way to upgrade the look of your videos.
You can get a $60 worth softboxes on Amazon today and enhance the look of your videos.
4. Camera Remote
To avoid getting up several times just to set up or adjust your camera correctly, it is better to have this super inexpensive tool to help you while filming.
Camera remotes help you in the filming process by providing an easier way to control the camera.
5. Gimbal or Tripod stabilizer
Video stabilization is another crucial factor to consider while vlogging. To avoid taking more time editing and stabilizing the footage in your editing software, it is better to solve that by using a tripod which can only cost around $45 (Gorilla Pod Tripod).
6. Video and Audio Editing Software
After recording your video and audio, you may find a need for removing some parts, adding some effects, color correction, and color grading, stabilizing, etc. Therefore, obtaining software like Filmora, Adobe Premiere Pro, Final Cut, Sony Vegas can help you solve these issues.
Adobe Premiere Elements 18 is the most preferable choice by most videographers due to its ability to produce quality videos of any design.
7. TubeBuddy
After you are done and ready to light up your YouTube channel, you should get TubeBuddy, which is an essential SEO tool for your YouTube videos.
You can use a free version and gain more, but if you want to enjoy the best experience, then you better go for a Pro version which charges less than $10 a month.
Conclusion
With all said, now it’s time for you to gets into work – check your wallet, plan according to your budget and start creating quality content for your viewers.
best equipment for youtube videos
What equipment do you need to create a professional studio lighting setup for filming YouTube videos? This article is going to give you tips and advice on choosing the correct lighting setup for you, as well as the accessories and other equipment you may need.
To create slick, professional videos that people will want to watch, you need to control two essentials – lighting and sound. We’re going to look at both, but let’s start with the lights.
1. Lighting (Ring Lights, Softboxes, LED Side Lights)
Ring Lighting

The first essential is your studio lighting setup. Ring lights like the Spectrum Aurora 13″ Mini Pearl III LED Ring Light, Spectrum Aurora 18″ Diamond Luxe III LED Ring Light and Spectrum Aurora 22″ Platinum Pro II LED Ring Light are one of the most popular lighting choices for video, and they are regarded as essential for beauty and makeup vloggers.
Why?
The ring-shaped lights give a soft, even light all over the face, minimising shadows and helping colours to appear on screen as they truly are. Ring lights can be used alone, or in combination with softboxes (more on that below).
Softboxes
Another important part of your lighting setup are softboxes. These are lightweight modifiers that fit over a studio light like a box. They come in many different shapes and sizes, and are covered with a white, light diffusing material at the front. This diffusion helps to create soft light with minimal shadow.
Buying softboxes in a kit makes good sense, as they generally contain two lights and softboxes, along with adjustable light stands to hold your lights safely while you film.
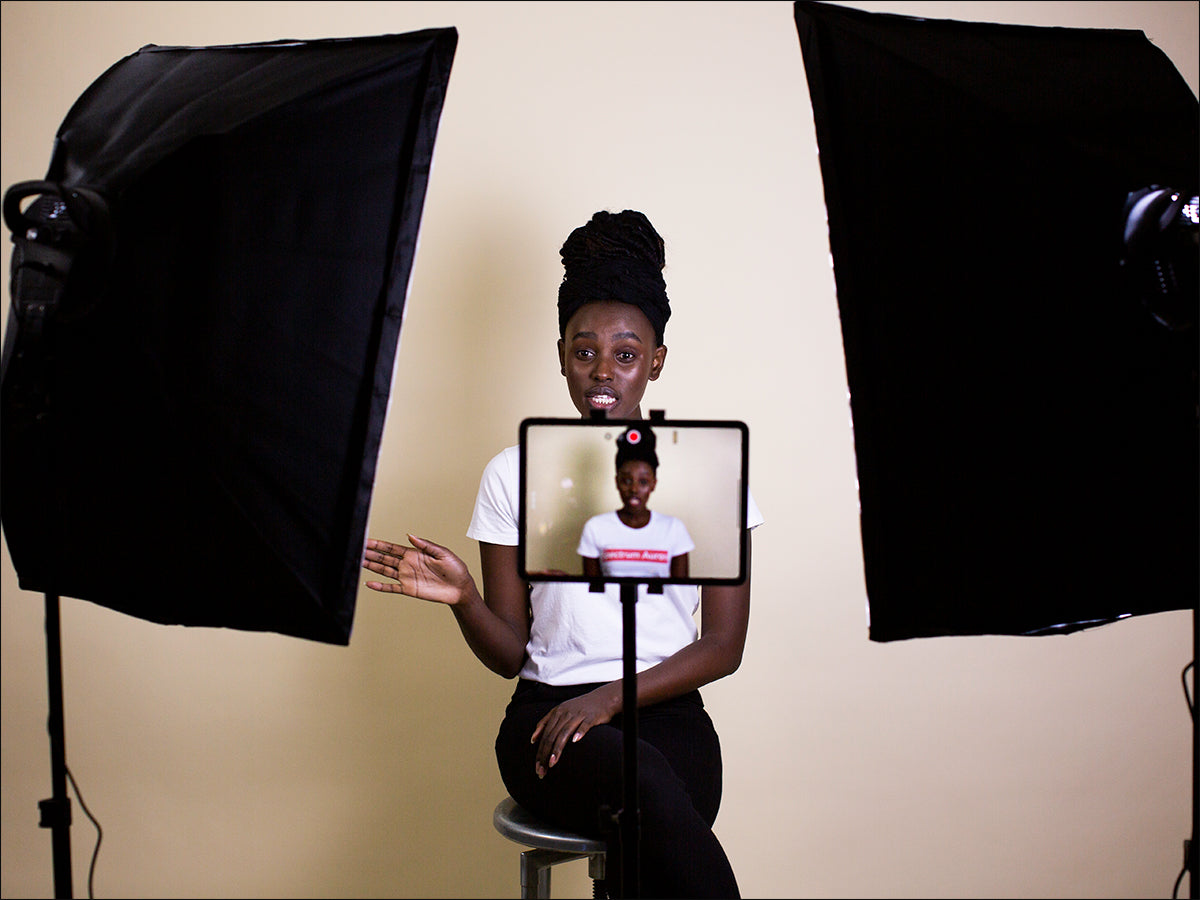
You can use two softboxes to create an even light on your subject by placing them at a roughly 45 degree angle on each side of your subject. Make sure the lights are at around eye level to your subject, and adjust each one as needed until there are no shadows on the face.
For a full studio lighting setup, try a ring light and softbox combination like the Spectrum Aurora 18″ Diamond Luxe III Complete Make Up and Beauty Studio Ring Light Softbox Lighting Kit.
This can take your lighting to a new creative level, as it means you can use the ring light as your main light, and the two softboxes can be used either side as fill light, or you can create three-point lighting with the ring light as your main, one softbox as the fill, and the other one as a background light.
LED Side Lights
LED panels are small, easily transportable side lights for your lighting setup. LED panels are made up of many small bulbs on a panel, and are becoming more and more common in professional film setups. One big advantage LED has over tungsten is that it does not throw off heat while running, which is a big bonus on a hot day or in a warm studio!
Side lights provide you with fill lighting from the sides, with the main light at the front providing the most powerful light.
2. Recording Device
Of course, you wouldn’t be able to create a video without something to record it with. DSLR cameras have very high-quality video recording capabilities these days, but they are expensive.
A smartphone can be used to record perfectly good video for YouTube if you’re just starting out.
3. Microphone

Don’t underestimate the importance of your microphone. After all, if you can’t hear anything clearly on a video, you’re not going to stick around and watch it, are you?
If you are using a smartphone or DSLR, the Boya By-MM1 Video Microphone for Smartphones and DSLR’s is a good place to start. The Rode Wireless Go II Dual Channel Microphone System is a great choice to go wireless, and it works with Smartphones, iPad, Tablet, DSLR camera, Camcorder, Audio recorder, PC and other audio/video devices.
If you want to shoot more moving or outdoor shots, the Boya BY-WM4 PRO-K2 Dual Wireless Microphone System may be the one for you. This unobtrusive mic clips securely to your lapel, and is not reliant on directional sound.
4. Backdrops
Backdrops like the Spectrum Full Paper Backdrops are a vital part of your studio setup, as they provide a smooth, uncluttered background to shoot your video against. They come in a huge variety of shades to suit the mood of the video you want to make. The Spectrum Half Paper Backdrops are smaller, which is great if you only have a small space to shoot in.
You’ll also need a stand to hold your paper rolls safely, like the Spectrum Backdrop Stand (3.1M x 3.0M) – Heavy Duty 8kg Load 4 Segment Crossbar, which, like the backdrops, can be used for shooting photos as well as video.
5. Editing Software
This is something all vloggers need to use, and it will enable you to put your video together seamlessly after you’ve finished shooting.
There are two types – free and premium editors, so you have to decide which is right for you.
Free Editors
These do the basics, like cut, paste clips and add basic texts. The two most popular are:
- Windows Movie Maker
- IMovie (comes ready installed in your Mac OS)
- InShot (Mobile App, Free version)
Premium Editors
The learning curve on these editors can be steep, but they are worth learning because they will give your video a much more professional polish than free editors. Top vloggers hire video editors, but if that’s out of your reach at the moment, here’s the DIY options:
- Adobe Premiere Pro – Very popular with YouTubers, and it has everything you need to edit. Downside is the monthly subscription payment if you don’t use it very often.
- Final Cut Pro – This is the alternative editor for Mac users, and is also professional standard. This is only available for a one off payment.
6. Tripod

If you want to hold your camera steady (or if you want to appear in your own video), you’ll need a sturdy tripod like the Beike Q999 Aluminium Tripod/Monopod with Ball Head. For a flexible, on-the-go alternative, try one of Hypop’s range of Travel Tripods for video and photo.
Conclusion
Hopefully, this article will have given you some pointers on a studio lighting setup, as well as other equipment for your home studio.
Here are a few other tips for recording your videos:
- You’ve got 15 seconds to make an impression! Attention spans are growing shorter, and research in 2015 showed it was down to only 8.25 seconds even then! This means you must make the first 15 seconds of your video matter. Make people curious. Show a glimpse of what’s to come.
- Don’t try to be someone else – be yourself, and let your personality show.
- Look at the lens, not the screen – if your camera has a flip screen, you may be tempted to look at it while talking. Don’t. Look at the lens instead to create more of a connection with your viewers.
- Use social media – build your audience and promote your YouTube videos on your social media platforms.
Conclusion
Let us know your thoughts in the comment section below.
Check out other publications to gain access to more digital resources if you are just starting out with Flux Resource.
Also contact us today to optimize your business(s)/Brand(s) for Search Engines