In the early days of the Internet, web design was a very different thing. It was all about making sure your site looked good, and that it would load on a variety of browsers. Screen resolution was much smaller, and many users were still using dial-up connections to access the web.
Today, designing for the web is much more complex. There are many more devices and browsers to consider, including phones and tablets as well as desktop computers. The size of websites has increased greatly over the past few years, with most sites having hundreds of pages or even thousands. And most importantly, there are many more people accessing the web from their phones than ever before.
That’s why we’ve created this guide to web design software: to help you learn about some of the tools that are out there and what they can do for you! Read on for our picks for best free software, paid apps & services, or online resources.
google web design software download
Google Web Designer 14.0.3.1020
Create engaging, interactive HTML5-based designs and motion graphics that can run on any device.
DOWNLOAD

Create animations
You can create animations in Google Web Designer in two modes, Quick mode and Advanced mode.
In Quick mode, you build your animation scene by scene: you add a new view of the entire page, change the elements you want to animate, and, optionally, modify your transition times and easings.
For more complex animation, Advanced mode lets you individually animate each of the the elements, optionally modifying transition times and easing as well. Advanced mode also shows layers, which let you change where each element is in the stack of elements.
Full 3D authoring environment
Create and manipulate 3D content utilizing an array of tools and the power of CSS3. Rotate objects and even 2D designs along any axis, visualizing 3D transformations and translations as you author.
Design view and code view
Code view lets you view and edit your code in Google Web Designer’s built-in code editing tool. Code view lets you create CSS, JavaScript, and XML files. Code view uses code autocompletion which makes your code easier to write, with fewer errors.
For Ads and HTML files, you can switch between Code view and Design view, with the changes that you make to the code in Code view reflected in the Design view. This lets you immediately test how changes in your code will affect your designs.
You can also select objects with the selection tool and change the CSS styling for those objects in the CSS panel.
Illustration tools
Import assets from any other creative suite or use the built-in illustration tools to create vector-style artwork – keeping your designs light. To create new HTML tags in your designs, just draw them in with the Tag tool.
The CSS panel lets you edit current styles, as well as add new CSS rules.
Easy ad workflow
Google Web Designer makes it simple to publish ads through any platform. Choose from DoubleClick Studio or AdMob, or go for the Generic option to push content through any other ad network. No coding required.
google web designer templates
Create a new ad from a template
The easiest way to create an ad is to use a template. Templates are pre-made ads in popular sizes, using generally popular styles and features. By replacing the images and other assets, you can quickly create a useful, working ad.
To create an ad from a template:
- Select New from template… from the File menu. This opens the Template Gallery.
- Optionally, sort and filter the available templates. You can also collapse and expand the section for each format.
- Click Select for the layout you want to use. Fields appear in the left-hand panel:
- Size – If multiple sizes are available, select the size you want.
- Name – Name your new file.
- Location – Optionally, change the location where the file will be saved. You can either enter the path to the location, or click the folder icon
to navigate to the location you want to use.
- If the template is available in Easy mode, select the mode you want to use for your new document:
- Easy mode – A simplified interface lets you customize text, assets, and colors in the layout.
- Standard mode – A new document opens with the layout you selected. You can add and replace assets in your newly created document.
- Click Create.
Sort templates
You can sort templates in a different order so that the ones you’re most interested in display first.

To sort templates:
- While viewing templates, click the Sort By dropdown.
- Select a sorting option:
- Most used
- Recently used
- Recently added
Filter templates
Filters narrow down your template options so that you just see templates with the characteristics you want.
To filter templates:
- You can browse available filters in the Filter panel on the left side of the Template Gallery.
- Expand a filter type to see the available filters, then check the boxes for the filters you would like to apply. If you select more than one filter, only templates that match all of the checked filters will display. For some combinations of filters, there may be no matching templates.
- If you already know the filter you want, you can search for it by entering the filter name in the Filter
field (e.g., type expandable if you want to view templates for expandable ads).
Any filters currently in effect are displayed as chips next to the “Sort By” dropdown.

Remove filters
To remove a filter, click the x by the filter name or uncheck it in the list of all filters.
Filter types
- Platforms – Specify the ad platform, such as Google Ads or AdMob.
- Ad Types – Choose among standard ad formats.
- Devices – Select your target devices, such as desktop or mobile.
- Features – Display only templates that incorporate a particular feature.
- Components – Find templates containing a specific component.
- Industries – View ad templates that were designed for specific business types.
- Dimensions – Look for specific sizes.
- Dynamic Vertical – Choose a data schema for dynamic ad templates.
Preview a template
For a clearer idea of how a template will look in its finished state, you can preview it in your browser.
To preview a template:
- Open the Template Gallery by selecting New from template… from the File menu, or Use template from the start page after launching Google Web Designer.
- Click Select for the ad layout you want to preview.
- Fields appear in the left-hand panel:
- Size – If multiple sizes are available, select the size you want.
- Browser – Choose the browser where you want the preview to appear.
- Click Preview.
Add and replace assets in a template
If the template you want to use is available in Easy mode, you can switch in your own assets using a streamlined interface.
Ad templates have placeholder assets and descriptive IDs for each element. To create an ad from a template in Standard mode, you can just replace each generic placeholder asset with an appropriate one for your ad. Ads created from templates are completely modifiable; you can add or delete assets, components, and events as you wish in order to create a more customized ad.
The “Swap Image” function lets you replace an image with either an image in the Library or an image that you upload. This is especially helpful when you’re replacing stock images from a template.
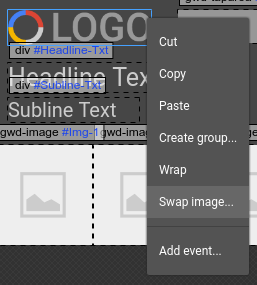
To replace an image in an ad created from a template:
- Right-click the image you want to replace.
- Select Swap image… from the pop-up menu.
- In the dialog, either select an image from the Library or click the add button
to select an image from your computer.
- Click OK.
To change text in a template:
- Select the text container element. You can easily select an element in the Outliner even when it’s behind or inside another element.
- Select the Text tool
from the toolbar on the left.
- Click inside the text container element. The element is outlined in blue and a blinking cursor indicates where you can start editing the text.
Conclusion
Let us know your thoughts in the comment section below.
Check out other publications to gain access to more digital resources if you are just starting out with Flux Resource.
Also contact us today to optimize your business(s)/Brand(s) for Search Engines