How to Publish Chrome Extension for FREE – Full Guide
Chrome extensions are simply small applications that you can use to add extra features to your Google Chrome browser. They could be useful in a lot of cases, like adding an option to translate a website from English to Spanish or blocking annoying ads, and so on.
The good news is that there are already thousands of them, but the bad news is that they all look similar, don’t they? That’s why you might want to create one yourself. Today I’m gonna show you how to do it in just a few simple steps!
How To Publish Chrome Extension For Free
Every Chrome extension is published on the Chrome Web Store. Think of it as the equivalent to Google’s Play Store or Apple’s App Store, but only for Chrome extensions and themes.
Steps
If you haven’t created one already, you will need to create a Developer account. In it, you will have a Developer Dashboard.
As I stated in the previous article, there is a $5 one time signup fee if you want to be able to publish Chrome extensions. This will give you the ability to publish up to 20 extensions
Once you are the proud owner of a Developer account, the next step is to upload your Chrome extension to your account. To do this, create a ZIP file with all the files associated with your extension. The only file Google requires you to upload is the manifest.json file. But you will want to add the JavaScript files you have as well.
After that, the next step is to publish our extension. Login to your developer account and go to your Developer Dashboard.
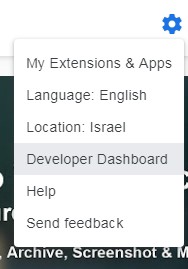
There you will see an Add New Item button.

⚠️ Be aware that once you add an extension to your Developer Dashboard you cannot delete it. As long as it is not published, it will not count towards your extension limit.
This will direct you to a page where you can upload the ZIP file we created earlier:
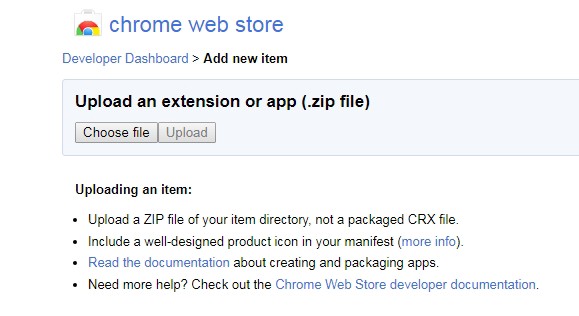
Assuming everything went fine, you will be directed to the next page:
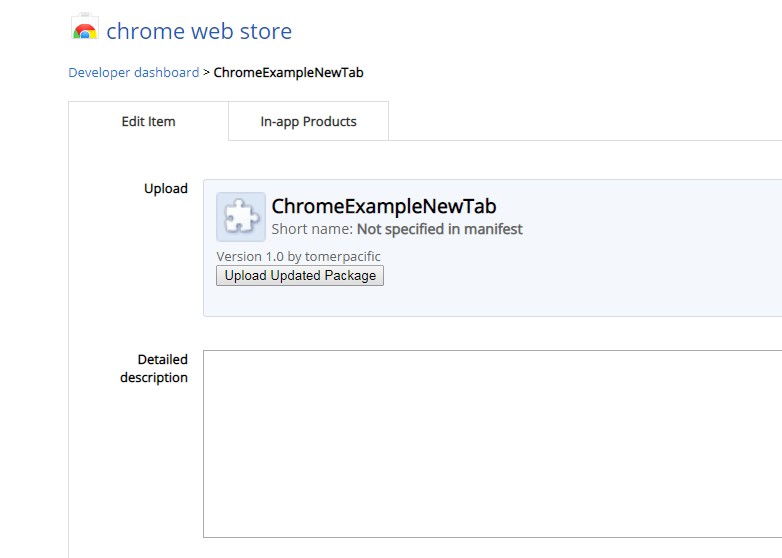
If you are planning to make changes to your extension, you can use the Upload Updated Package button to re-upload your ZIP file.
On this page, you can add an icon that will be shown on the toolbar:

Add screenshots of your extension (these will be used when a user looks at your extension):

And various other features like choosing a Category for the extension (I.E. Fun), choosing the regions where your extension will be available, the pricing of your extension, and other categories which I suggest you take a look at.
When you are done fine tuning the details of your extension, you will arrive at the end of the page and see the following buttons:

The two left buttons allow you to save the work you have done so far configuring your extension (or discarding it), and the two right ones are for when you are ready to publish. To see how everything you configured will look on the Chrome Web Store, press the Preview Changes button. When you are satisfied with what you have, click Publish Changes.

Congratulations! You have just published your first Chrome Extension!
In your Developer Dashboard you will now see this:

Clicking the Stats link will give you analytics regarding your extension (how many impressions, installs and active users). I’m looking forward to seeing your published Chrome extensions.
add local extension to chrome
Install a Chrome Extension From a .ZIP In Under a Minute
Usually when you install a Chrome extension you do so from Chrome’s Web Store. However, some extensions are not published on the webstore. That may be because they use additional functionality not supported by the Web Store’s rules, are independently developed, or are beta versions.
These are known as external extensions and you must manually install them.
Below are two easy steps to install external extensions in Chrome. These steps work for ‘unpacked’ extensions (downloaded as a compressed .zip/rar folder) as well as .crx files.
Before we get to the steps – which literally take less than a minute to complete – we want to make a note about the security risks.
Security Risks
There is a reason Google wants you to get extensions from the Web Store: Extensions can view all of your browsing activity and the information you are typing into your browser. This is an extreme security risk if they have been maliciously designed.
When extensions are submitted to the Web Store, Google has the ability to review and block the malicious ones. When you are manually installing an extension, no such review has occurred, and the code could be malicious and untested.
You should only manually install an extension when you understand this risk.
Download: Certificate Management Checklist Essential 14 Point Free PDF.
How to Manually Install A Chrome Extension
- Download the extension. Usually extensions come packaged as a zip/rar file. Extract the files into their own folder. If the extension is a “.crx” file, this is a format for Chrome extensions which contains all of its data – no need to extract anything.Give the extension files a permanent home. Chrome will need continual access to these files for the extension to work, so the file path cannot change. This means don’t leave the files on your desktop or downloads folder where you may accidentally tidy them up or delete them later.
- In Chrome, navigate to chrome://extensions/Now drag and drop the extension from your file manager anywhere onto the extensions page in Chrome. If the extension is a .crx file you will be asked to review the permissions and add the extension.
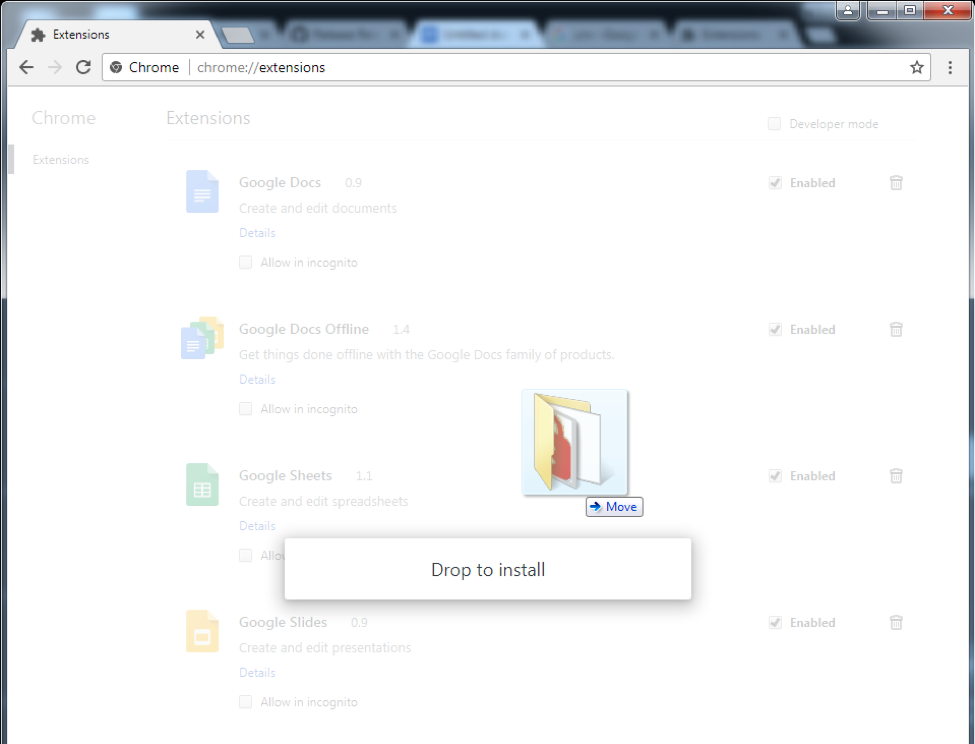
Done! The extension is installed and you are ready to go. You can now manage the extension as you would any other, and its icon will appear in the Chrome Menu (if it has one) to the right of the address bar.
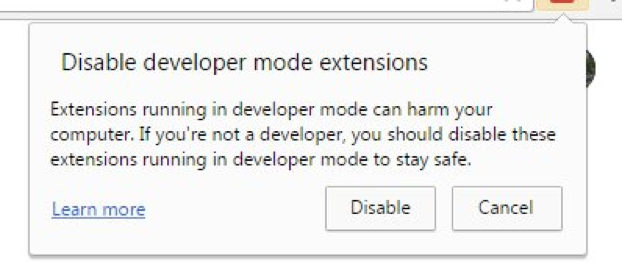
Note that every time you restart Chrome, the first new window will present a notice about the security risks of developer mode. To leave the extensions enabled, click “Cancel.” This is a bit of a nuisance, but it’s only one click!
Conclusion
Let us know your thoughts in the comment section below.
Check out other publications to gain access to more digital resources if you are just starting out with Flux Resource.
Also contact us today to optimize your business(s)/Brand(s) for Search Engines
