The HubSpot Chrome extension for Outlook is a simple, lightweight tool that helps businesses of all sizes and types run more efficiently. By using the HubSpot Chrome extension for Outlook, you can turn your emails into organized contact records or tasks, and mark your emails as either done or not done—all with just one click. The Chrome extension for Outlook also helps you automatically track email opens and clicks, schedule meetings (even if you and your recipient both use Google Calendar), and share links to documents stored in Dropbox, Box, or Google Drive.
Table of Contents
Hubspot Chrome Extension For Outlook
With the HubSpot Sales Chrome extension for Gmail, HubSpot Sales Office 365 add-in, or the HubSpot Sales Outlook desktop add-in, you can access your sales tools directly from your inbox. Refer to the table below to determine which extension or add-in is compatible with your setup.
Please note: starting April 5, 2022, the Office 365 add-in will no longer be compatible with Outlook for desktop on Microsoft Office 2013-2019. You can download and use the Outlook desktop add-in instead, or continue to use the Office 365 add-in on Outlook on the Web. You could also consult with your IT administrator and update to Microsoft Office 2021 or the latest version of Office 365.
If you decide to download the Outlook desktop add-in, make sure to also uninstall the Office 365 add-in.
| Chrome extension | Office 365 add-in | Outlook desktop add-in | |
| Email host | Gmail or G Suite | Office 365 | Any |
| Email client | Gmail/G Suite in Chrome | Outlook on the web Outlook.com* Outlook for Mac – version 15.33 or later Outlook for PC – version 1603 (build 6769.0000) or later | Outlook 2019 Outlook 2016 Outlook 2013 |
| Operating system | Mac, PC | Mac, PC | PC only |
| System requirements | N/A | N/A | Microsoft Windows 7,8, or 10 Microsoft Outlook 2013 or 2016 Microsoft Visual Studios 2010 tools for Office Runtime .NET 4.6 or higher |
| Connected inbox required | No** | Yes | No** |
| Centrally deploy/install for multiple users | Available | Available | Not available |
| Quick install links | Install | Install | Install |
*If you’re accessing your email on Outlook.com, you cannot pin the Office 365 add-in in the inbox.
**Some sales tools cannot be used without a connected inbox.
Please note: HubSpot Sales does not support Apple Mail. Apple does not provide support for third-party developers creating Apple Mail add-ons.
Install the HubSpot Sales Chrome extension
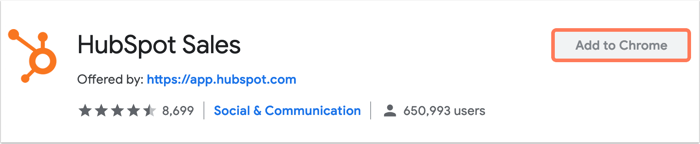
- Click here to navigate to the HubSpot Sales extension in the Google Chrome store.
- Check to make sure that you’re signed into the correct Gmail account. You can see which account you’re logged in to in the top right.

- In the dialog box, click Add to Chrome. If this is the first time you’ve added the extension, you’ll be prompted to log in.
- Log into your HubSpot Sales account when prompted.
With the HubSpot Sales Chrome extension, you’ll have access to your templates, documents, and sequences from your Gmail inbox. You’ll also receive instant Chrome notifications for tracked emails and can quickly see your activity feed by clicking the extension icon in your browser toolbar.
If you are a Google admin for your organization, you can automatically install the extension for multiple users.
Install the HubSpot Sales Office 365 add-in
Please note:
- Outlook installed from the Microsoft Store is not compatible with the HubSpot Sales Office 365 add-in. Check your Outlook version to ensure it is Click-to-run.
- Office 365 from GoDaddy is not compatible with the HubSpot Sales Office 365 add-in, because GoDaddy currently does not support third party apps.
- The HubSpot Sales Office 365 add-in can only be installed on an Office 365 hosted email account (Office 365 Business Premium, Office 365 Business Essentials, or Office 365 Personal). If your inbox is hosted with a different email provider, you cannot install the Office 365 add-in, even if you are using Outlook to access that email provider. If you don’t have an Office 365 account but use Outlook for Desktop on Windows, install the HubSpot Sales Outlook desktop add-in instead.
- Do not install both the HubSpot Sales Office 365 add-in and the HubSpot Sales Outlook desktop add-in on the same device. These add-ins will conflict.
There are two ways to install the HubSpot Sales Office 365 add-in:
- Install the add-in individually
- Centrally deploy the add-in
Install the add-in individually
You can install the Office 365 add-in individually in your account. Keep in mind that if you have multiple email accounts in Outlook, you have to install the add-in in each email account where you want to access the sales tools.
- Click here to navigate to the add-in in Microsoft AppSource.
- In the left sidebar, click Get It Now.
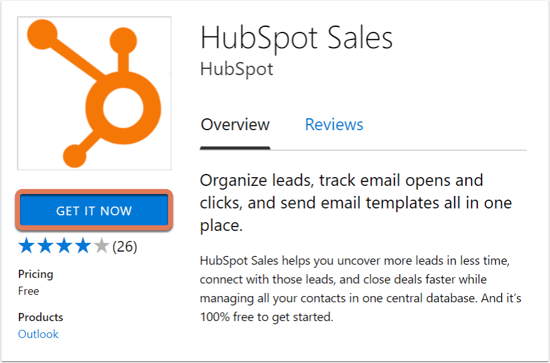
- In the dialog box, click Continue.
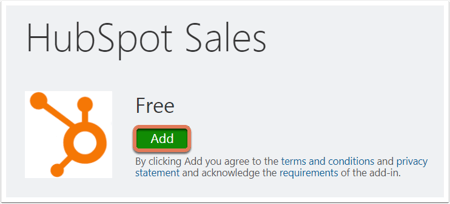
- You’ll be taken to your Office 365 account. Click Add.
Once installation is complete, you’ll be redirected to a page indicating the add-in has been successfully installed. You can now access your templates, documents, and sequences from your Outlook inbox.
To receive instant notifications for tracked emails, run Chrome with the HubSpot Sales Chrome extension installed.
Centrally deploy the add-in
Office 365 admins can centrally deploy the add-in to all Office 365 users in your organization. When the add-in is centrally deployed, all Office 365 users on the domain will automatically get the add-in, with no additional steps required.
Follow Microsoft’s instructions to publish Office add-ins using centralized deployment via the Office 365 admin center. On the Centralized deployment step, select I want to add an Add-In from the Office Store, and search for HubSpot Sales.
Please note:when the add-in is centrally deployed, you may need to relaunch Office to see the add-in icon appear on the ribbon of the app. Outlook add-ins can take up to 12 hours to appear.
Install the HubSpot Sales Outlook desktop add-in
Please note:
- The HubSpot Sales Outlook desktop add-in does not support Outlook for Mac. If you use Outlook for Mac, an Outlook on the web account, or an Outlook.com account, install the HubSpot Sales Office 365 add-in instead. Additionally, HubSpot Sales is not supported in terminal server environments.
- Do not install both the HubSpot Sales Office 365 add-in and the HubSpot Sales Outlook desktop add-in on the same device. These add-ins will conflict and cause issues for your sales tools.
- Outlook installed from the Microsoft Store is not compatible with the HubSpot Sales Outlook desktop add-in. Check your Outlook version to ensure it is Click-to-run. Learn more about the technical requirements for installing the Outlook desktop add-in.
- Click here to download the HubSpot Sales Outlook desktop add-in.
- Run the HubSpot Sales for Outlook installer (setup.exe). If you come across any errors when installing the extension, refer to the installation troubleshooting guide for more information.
- Restart Outlook.
- When prompted, log in with your HubSpot Sales account credentials.
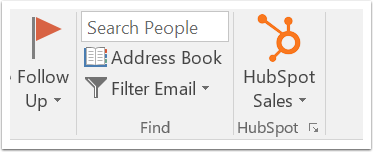
Once installed, HubSpot Sales should appear in the inbox ribbon.
You can now access your templates, documents, and sequences right from your Outlook inbox. To receive instant notifications for tracked emails, run Chrome with the HubSpot Sales Chrome extension installed or download the HubSpot Sales for Windows tray app. This is an additional component of the add-in that allows you to receive instant notifications without runningGoogle Chrome.
- Click here to download the HubSpot Sales for Windows tray app (if you’re having trouble getting the download to start, click here instead).
- Run the downloaded setup.exe file.
Once the app is installed, you can view your activity feed by clicking the HubSpot sprocket iconsprocket in your Windows tray.
Was this article helpful? *Yes No
install hubspot chrome extension
The HubSpot Social Chrome extension allows you to schedule or publish content through HubSpot without having to go to the HubSpot social tool. You can also share specific snippets of text in the content in your social post.
Install the HubSpot Social Chrome extension
- In your HubSpot account, click the settings settings icon in the main navigation bar.
- In the left sidebar menu, navigate to Marketing > Social.
- Click the Publishing tab.
- In the Publish from your browser section, click Install the Chrome Extension.

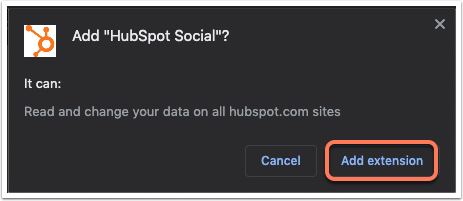
- In the Chrome Web Store, click Add to chrome. Then, in the dialog box, click Add extension.
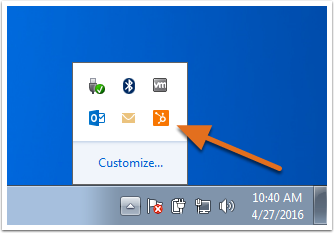
- You’ll be redirected to a confirmation page for the extension, and the HubSpot Social Chrome extension should appear in your browser toolbar as an orange sprocket icon sprocket.
Please note: the HubSpot Social Chrome extension will only work properly when your Chrome cookie settings are set to Allow all cookies or Block third party cookies in Incognito. Learn more about how to change your Chrome cookie settings in Google Chrome’s Help Center.
Necessary disclosure: The HubSpot Social Chrome extension only accesses information about the current page, after its toolbar button is clicked, using the permissions granted by the Google Chrome’s activeTab permission.
Select the HubSpot account to use with the extension
If you’re a user in multiple HubSpot accounts, to select the account to use with the HubSpot Social Chrome extension:
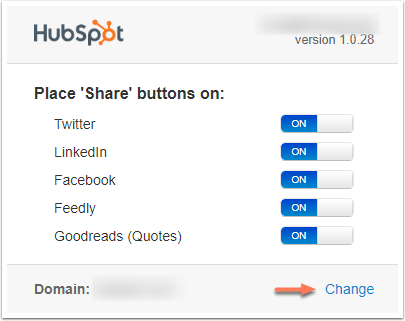
- Right-click the HubSpot Social Chrome extension icon sprocket in your browser, and select Options in the dropdown menu.
- In the extension settings page, click Change on the right of Domain or Hub ID.
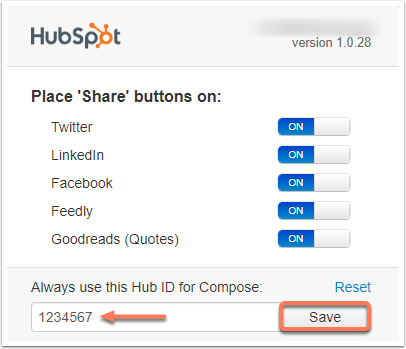
- Under Always use this Hub ID for Compose, enter the Hub ID of the HubSpot account, then click Save.
Share content with the HubSpot Social Chrome extension
- In the page you want to share, click the HubSpot Social Chrome extension icon sprocket in your browser toolbar. If there is text in the page you will like to share in the social post, highlight and right-click the text, and in the dropdown menu, select Share Text via HubSpot.
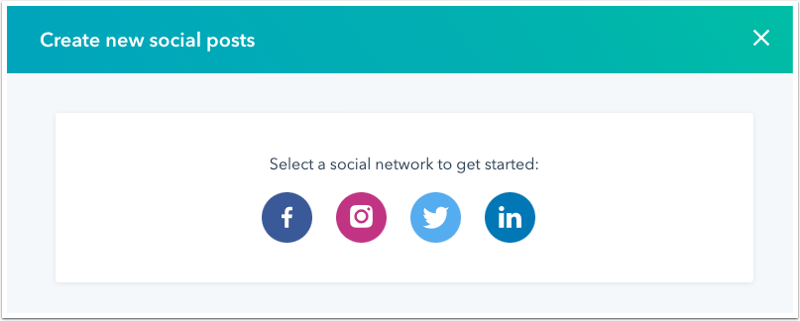
- In the right panel, select the social network to publish your social post to.
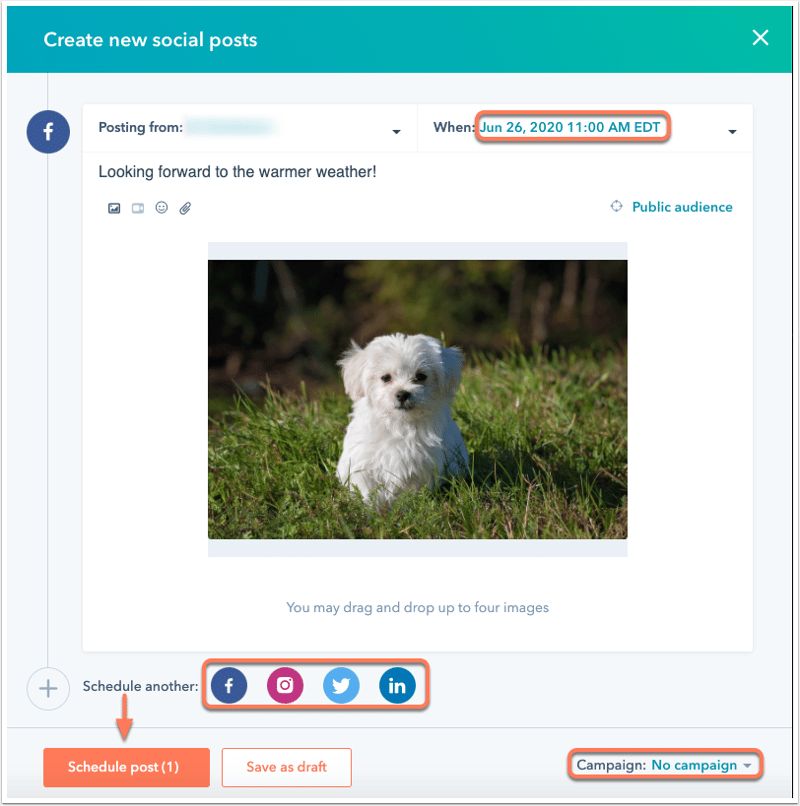
- The social post will automatically populate the title and URL of the website page you’re on, and a post preview will be generated from the URL metadata. This will include a picture (if available), title, meta description (if available), and link.
- Click the Posting from dropdown menu to select the account to publish the social post to.
- Click the When dropdown menu to select a specific date and time to publish the social post, or click Publish now to publish the post immediately.
- In the bottom right, click the Campaign dropdown menu and select a campaign to associate the social post with.
- Once you’ve finished setting up your social post, you can choose to publish another post or publish to another social account by clicking the corresponding social icon next to Schedule another. This will automatically duplicate your existing post content into the new post.
- Once your post(s) is ready to go, click Schedule post or Publish post now to schedule it for publishing or publish it immediately, depending on the publish date and time you selected.
Was this article helpful? *Yes No
Conclusion
Let us know your thoughts in the comment section below.
Check out other publications to gain access to more digital resources if you are just starting out with Flux Resource.
Also contact us today to optimize your business(s)/Brand(s) for Search Engines