Selenium is a web automation framework that can be used to automate website testing. Because Selenium starts a webbrowser, it can do any task you would normally do on the web.
Selenium automates browsers. That’s it! What you do with that power is entirely up to you. Primarily, it is for automating web applications for testing purposes, but is certainly not limited to just that. Boring web-based administration tasks can (and should!) also be automated as well.
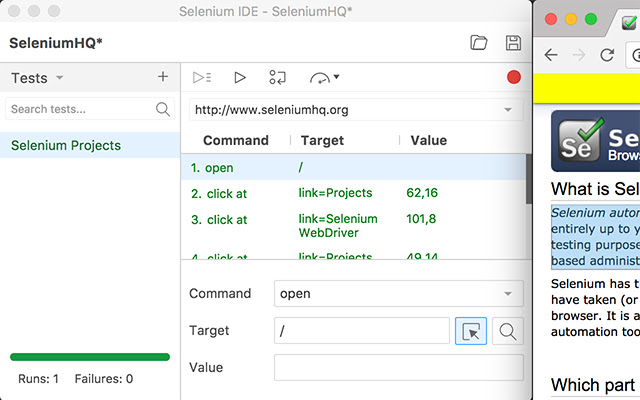
Table of Contents
Chrome Extension For Selenium
Modern browsers have great functionality for displaying content, tracking GPS coordinates, remembering passwords and much more. However, there is always a need for developers to come up with ways to extend browser functionality even more. This is why browser extensions are created. Such extensions can be tested in the manual testing process, but it will be better to see if we can do it automatically as part of a test automation process. If we can use it as part of our Selenium testing then it would be that much better.
So let’s consider this case as an example. We need to perform a standard UI autotest using Selenium testing, during which we will use the REST API chrome extension to send requests for launch tests on various Experitest environments. Let’s start doing this step by step with some brief explanations:
1) Create a Java Maven Project
The first thing we need to do is to create a Java Maven project in our IDE with default settings. IDEA is used as an IDE in all examples of this article.Create a class with a simple Selenium code that you can see here.
If you are using the IntelliJ IDEA, don’t forget to enable auto-import, and confirm an import of all necessary dependencies (click Ctrl+Enter).
Make sure everything works correctly:
selenium testing – passed
2) Launching Chrome Browser Instance
Please note that when we launch our Chrome Browser instance, it doesn’t have any extensions.
However, since we plan to use one of them, let’s talk about how to add and use it.
a) Installing:
First, we need to find the necessary extension in the chrome web store:
selenium testing – restlet
In order to use the application manually, we can add it to your Chrome from the store, but for auto-testing we can’t use the same method. Leave a bookmark on this page, we will return to it later.
b) Copy the URL, and go to chrome-extension-downloader.com web site to download the file of this extension to your work machine.
c) We modify our code so that when we launch an instance of our browser, our extension is pre-installed into it:
d) Run the test again and make sure everything worked out. It is important to pay attention to the fact that the first part of the test still works correctly, and our extension was successfully installed. You should see this as a result:
In manual testing, in order to start using the extension, just click on its icon and continue to use it (the way and actions depend on the specific extension).
e) At its core, each extension is just a set of files, which is a typical web application. This understanding allows us to use Selenium testing to manage extensions! We need to look at what this application consists of to find the HTML pages, and here’s how:
a) Open the Chrome web app store again, find and install the "Chrome extension source viewer" app:selenium testing – source viewer
b) It’s time to return to the REST API installation page in the web store (where I asked to bookmark earlier). Important point: In order to open any extension as a simple web page, go to the corresponding address of the form: chrome-extension:///.html. We need to copy from the URL:
selenium testing – chrome web store
Also, on this page, CRX will become active, and we will be able to open the source code for the extension that we are interested in:
selenium testing – restlet
c) Here we see what the application consists of. Use the search to find only HTML pages:
At this stage, we can analyze the pages found, and determine the main one of them (usually it’s not difficult). So, in our case, this page will be “restlet_client.html”. Let’s copy the name of this page (sometimes it can be a path and not just the final name of the page) and paste it into our link, merging with ExtensionID that we got earlier.
d) Let’s go to the received URL (chrome-extension://aejoelaoggembcahagimdiliamlcdmfm/restlet_client.html) in a new tab:
selenium testing – requests
It works! This is a very good approach, since it allows you to not only use the extension as a tool for testing, but also to test the extension itself. But let’s return to using it in the process of testing another web application.
3) Add a new part to our Selenium code:
This code will open REST API app in a new tab.
4) Creating a Test Suite with REST API
Now we must prepare the tests for the second part of our script. Go to the REST API application, and create a test suite. As a set of APIs, we will choose to perform the test via the Experitest cloud platform – this is a good solution because we can include cross-platform testing here. Start testing on different platforms using the Experitest API, by reading more here. For simplicity’s sake, we will use the default Demo Test. We will run the tests one by one, waiting for the completion of testing on another platform. In the end, make sure everything went well. I got this test set:
selenium testing – requests
Performing this test requires authorization on experitest.com, as well as the ability to download files without using the system api, let’s add this to our Java code. The final version can be viewed at this link.
If you did everything correctly, you will see the following as a result:
selenium testing – scenarios
Then, the Chrome browser will be closed, and you will see the test status in your IDE:
selenium testing – passed
So let’s summarize:
We have figured out how to run any extensions using ChromeDriver.
We have learned how to use extensions by Selenium testing code. This allows us to not only use the functionality of the extension for auto-testing but also opens up opportunities for testing the extensions themselves!
We have figured out how to run cross-platform testing based on the Experitest cloud-service using the REST API application.
One more Selenium testing tip:
Within the framework of a real project, scripts for testing APIs (or, as in our case, running tests with parameters using APIs) can be placed in a repository over which a team of engineers works. In this case, you can easily apply the method earlier described in the article “How to use Jenkins pipeline to launch Selenium tests” in order for your Jenkins to run the tests automatically when necessary and you can always make sure that the changes you have made do not damage the application.
chrome extension for selenium locators
Are you facing problems while trying to find XPath in Selenium? Well, you are not alone! This is among the most common challenges most developers face while using Selenium for web testing. But not anymore, as we have picked 10 of the best Chrome extensions to make it easier for you to find XPath in Selenium.
Before we begin, we think it’s a good idea to point out what is XPath in Selenium.
XPath is one of the most popular ways to find locations of WebElement in Selenium. With XPath expressions, you can find objects that are highly dynamic and fragile. Whenever you want to perform automation testing of any web applications, the first thing that you should do is identify the WebElements and the actions to be performed on them.
In case you are wondering how to use XPath in Selenium, we have got you covered! Find our blog on the complete guide for using XPath in Selenium with examples.
Selenium provides eight different locators to identify the WebElement on the web page. They are as follows: Id, name, className, linkText, partialLinkText, tagName, xpath, and cssSelector.
However, it could be challenging for the developers to find XPath of WebElements in Selenium while performing cross browser testing. For example, the element might not have any id, name, or className. In such cases, you could use XPath or CSS selector to locate the WebElement. With Chrome extensions, you can ease this process of finding XPath of web elements.
Read our blog to gain more in-depth insight on how to find the text of an element in Selenium.
The following blog will take you through ten Chrome extensions to find Xpath in Selenium. To start with, let’s see some of the benefits of using XPath.
Advantages of using XPath to locate a WebElement
Using Selenium locators to locate an element on the webpage depends on the complexity of DOM (Document Object Model). Given below are five advantages of using XPath in Selenium as the locator to capture an element in the webpage:
With the help of XPath locators, one can traverse the DOM either upwards or downwards.
It helps in locating the elements in the webpage using the text.
It helps locate the elements by establishing the relationship between parent node, child node, and descendant.
Locates the exact element by specifying the position of the element in case there are multiple matches.
Locates any element in DOM, uniquely.
Chrome Extensions to find XPath of an Element in Selenium
The most common and popularly used Chrome extensions for finding the XPath of WebElements are discussed below (in no particular order).
- SelectorsHub
SelectorsHub is a Chrome extension that helps in finding the XPath very easily. It provides a unique relative XPath. SelectorsHub supports shadow DOM, iframe, frame, and SVG elements, allowing us to write our XPath and subsequently verify it.
How to download and add the SelectorsHub plugin to Chrome?
You can download the extension from their official website, the link to which has been provided here.
After adding this plugin to your browser, restart the browser. Navigate to the webpage and enable the extension by clicking on the plugin.
How to find the XPath of an element using SelectorsHub?
Step 1: Right-click on the element for which XPath has to be found. Then click on Inspect.
Step 2: Click on the SelectorsHub option.
Step 3: All the attributes will now be displayed, which can be easily copied and pasted in your automation code.
SelectorsHub
Source
- RexPath
RexPath has emerged as the most popularly used Chrome extensions to find Xpath for locating the WebElements. It provides all possible selectors in a single click. To get started, all you need to do is add the extension to the Chrome browser and then restart your browser.
How to download and add the RexPath plugin to Chrome?
You can download RexPath from Chrome Web Store, the link to which has been provided here.
How to find the XPath using RexPath?
Step 1: Right-click an element and select “RexPath.”
Step 2: Use the query builder to build a new XPath by clicking on specific attributes and specifying the number of ancestors.
A variety of custom XPaths will be generated on the right side of your screen, as shown below:
XPath using RexPath
Source
selenium-certification
This certification is for anyone who wants to stay ahead among professionals who are growing their career in Selenium automation testing.
Here’s a short glimpse of the Selenium 101 certification from LambdaTest:
- XPath Finder
It is one of the simplest Chrome extensions to find XPath of a WebElement. You can easily add this extension to Chrome and start finding the XPaths.
How to download and add the XPath Helper wizard plugin to Chrome?
You can download the plugin by clicking here. Once downloaded, it will be extremely convenient to get the XPath of any WebElement.
How to get the XPath using XPath Finder?
Step 1: Click on the plugin which has been added to the Chrome browser and witness how the mouse pointer instantly turns into a cross symbol.
Step 2: Move the desired WebElement for which the XPath has to be determined, and the element will be highlighted.
Step 3: Click on the specific element, and the XPath of the corresponding element will appear on the bottom left side of the screen.
Here’s the screenshot that has been captured for locating the XPath of the login button on the webpage:
Source
- XPath Helper
XPath Helper makes it easy to extract, edit, and evaluate XPath queries on any webpage. It is one of the widely acclaimed and recommended Chrome extensions to find Xpath as well, that smoothens up locating WebElements.
How to download and add the XPath Helper wizard plugin to Chrome?
You can download the Chrome extension from here.
Click “Add to Chrome”, and now the plugin will be added to our browser extensions
How to find the XPath using XPath Helper?
Step 1: Click the XPath Helper plugin icon.
Step 2: Press CTRL + SHIFT + X and click on the element to be inspected.
Step 3: Now, the results will be displayed on the query box. The Xpath can also be edited and then used in the automation script.
XPath helper
Source
- Scraper
Scraper can be used to extract data from webpages and align them into spreadsheets. It is a simple and easy extension that can make online research more seamless and smooth.
How to download and add the Scraper plugin to Chrome?
You can download the Chrome plugin from this link.
Click on “Add to Chrome” to add the Scraper extension to the browser.
How to find XPath using Scraper Chrome extension?
Step 1: Right-click on the WebElement for which XPath has to be found. A context menu gets opened.
Step 2: Click on the “Scrap similar…” menu option to launch another window to show the XPath of the selected element.
Scraper Chrome extension
Source
Testing with Selenium
- Relative XPath Helper
As the name suggests, Relative XPath Helper is a Chrome extension that helps determine the expression for relative XPath of two web elements. It is an uncomplicated yet convenient extension to draw comparisons between two web elements.
How to download and add the Relative XPath Helper plugin to Chrome?
You can download the Chrome plugin from this link.
Click “Add to Chrome” and then click on “Add extension.” Now you are ready to use the Relative XPath Helper extension to find the XPath of a WebElement.
How to find the XPath using Relative XPath Helper extension?
Step 1: Click the Relative XPath Helper plugin.
Step 2: Right-click on the WebElement for which the Xpath has to be found.
Helper extension
Source
- Firebug Lite for Chrome
Firebug was one of the browser extensions that was used earlier for finding the XPath of the element. The Firebug Lite is a port of Firebug as the latter is not supported by Chrome anymore.
How to download and add the Firebug Lite plugin to Chrome?
You can download this Chrome extension by clicking here.
Click “Add to Chrome” and then click on “Add extension.” Now you are ready to use Firebug Lite as a Chrome extension to find the XPath of a WebElement.
How to find the XPath using Firebug Lite for Chrome?
Step 1: Click on the Firebug Lite plugin.
Step 2: Right-click on the WebElement for which the Xpath has to be found.
Source
- TruePath
This Xpath finder Chrome extension is one of the most efficient plugins which provides multiple relative XPaths based on different attributes, thereby taking center stage as one of the top-rated Chrome extensions to find Xpath in Selenium.
How to download and add the TruePath plugin to Chrome?
The TruePath plugin can be easily added to Chrome from their official link.
How to get the XPath of the WebElement using TruePath extension?
Step 1: Enable the TruePath plugin.
Step 2: Right-click on the element to be inspected
Step 3: Hover over the Relative XPath options. You may find different options for writing the XPath based on various attributes like id, classname, linkText, etc.
TruePath extension
Source
Given below are the XPath suggestions provided by TruePath for the Login button WebElement.
chrome-extension
As it generates multiple relative XPath for the target element, it provides stability and drastically reduces the manual effort to construct the XPath.
Upon the XPath selection, TruePath also provides additional information on the WebElement.
TruePath
- XPath Helper Wizard
Wizard creates XPaths that are short and less likely to break, even if there are any changes in the webpage. A convenient and conducive Xpath finder Chrome extension, Xpath Helper Wizard, is as easy to use as effective.
How to download and add the XPath Helper wizard plugin to Chrome?
You can download the extension by clicking here.
Click on the “Add to Chrome icon” and then click on “Add Extension” in the popup. After adding the XPath Helper Wizard extension to your browser, you can start picking up the XPath suggestions provided by the extension.
How to find the XPath of a WebElement using XPath Helper Wizard?
Step 1: Open a new tab and navigate to the desired webpage.
Step 2: Press CTRL+SHIFT+X or click the XPath Helper button in the toolbar to open the XPath Helper console
Step 3: Hold down Shift as you mouse over elements on the page. The query box will continuously update to show the XPath query for the element below the mouse pointer, and the results box will show the results for the current query.
XPath Helper Wizard
Source
- XPath Generator
The XPath Generator is one of the most renowned extensions that can be added to Chrome to find the XPath of a WebElement. It is a very simple and easy technique to capture the XPath in Selenium.
How to download and add the XPath Generator extension to Chrome?
You can add the XPath Generator plugin using this link.
Click “Add to Chrome” and then click on “Add extension.” Now you are ready to use the XPath Generator to find the XPath of a WebElement.
How to find the XPath using the XPath Generator extension?
Step 1: Click the XPath Generator plugin.
Step 2: Right-click on the WebElement for which the Xpath has to be found
XPath Generator plugin
Source
Wrapping Up
In this article, we have seen different locators used to locate the WebElements on the web page, throwing light on ten Chrome extensions variations to find XPath in Selenium. We have taken you through a quick introduction to XPath, the advantages of using Chrome extensions in XPath in locating the elements on the webpage, popularly used Chrome extensions to find the XPath, along with step by step comprehensive tutorials on how to use them. Hence, go ahead and utilize these plugins to find the XPath, thereby saving up a lot of time and effort!
We hope this selection inspired you. If you think we missed a good extension, please suggest it in the comment section below; we’ll be happy to add it to our selection
Conclusion
Let us know your thoughts in the comment section below.
Check out other publications to gain access to more digital resources if you are just starting out with Flux Resource.
Also contact us today to optimize your business(s)/Brand(s) for Search Engines