Javascript SEO tools is a software product designed to help web developers, marketers and bloggers improve their Search Engine Optimisation.
It’s a bridge between the world of Javascript and the world of Search Engine Optimisation. If you’re looking to improve your SEO, then this might be what you’re looking for!
Table of Contents
Javascript Seo Tools
Gone are the days when you’d only needed to look at the source code of a page to check if it includes the right content.
JavaScript has made it more complicated, in that it can add, remove or change different elements. Looking at the source code is not enough; you need to check the rendered HTML instead.
Step 1: Check How Much a Website Relies on JavaScript to Serve the Content
The first thing that I usually do when I see a website that relies on JavaScript is to check how much it depends on it. The easiest way to do this is to disable JS in your browser.
I use the Web Developer Chrome extension for that.
Simply open settings, click Disable JavaScript and reload the page:
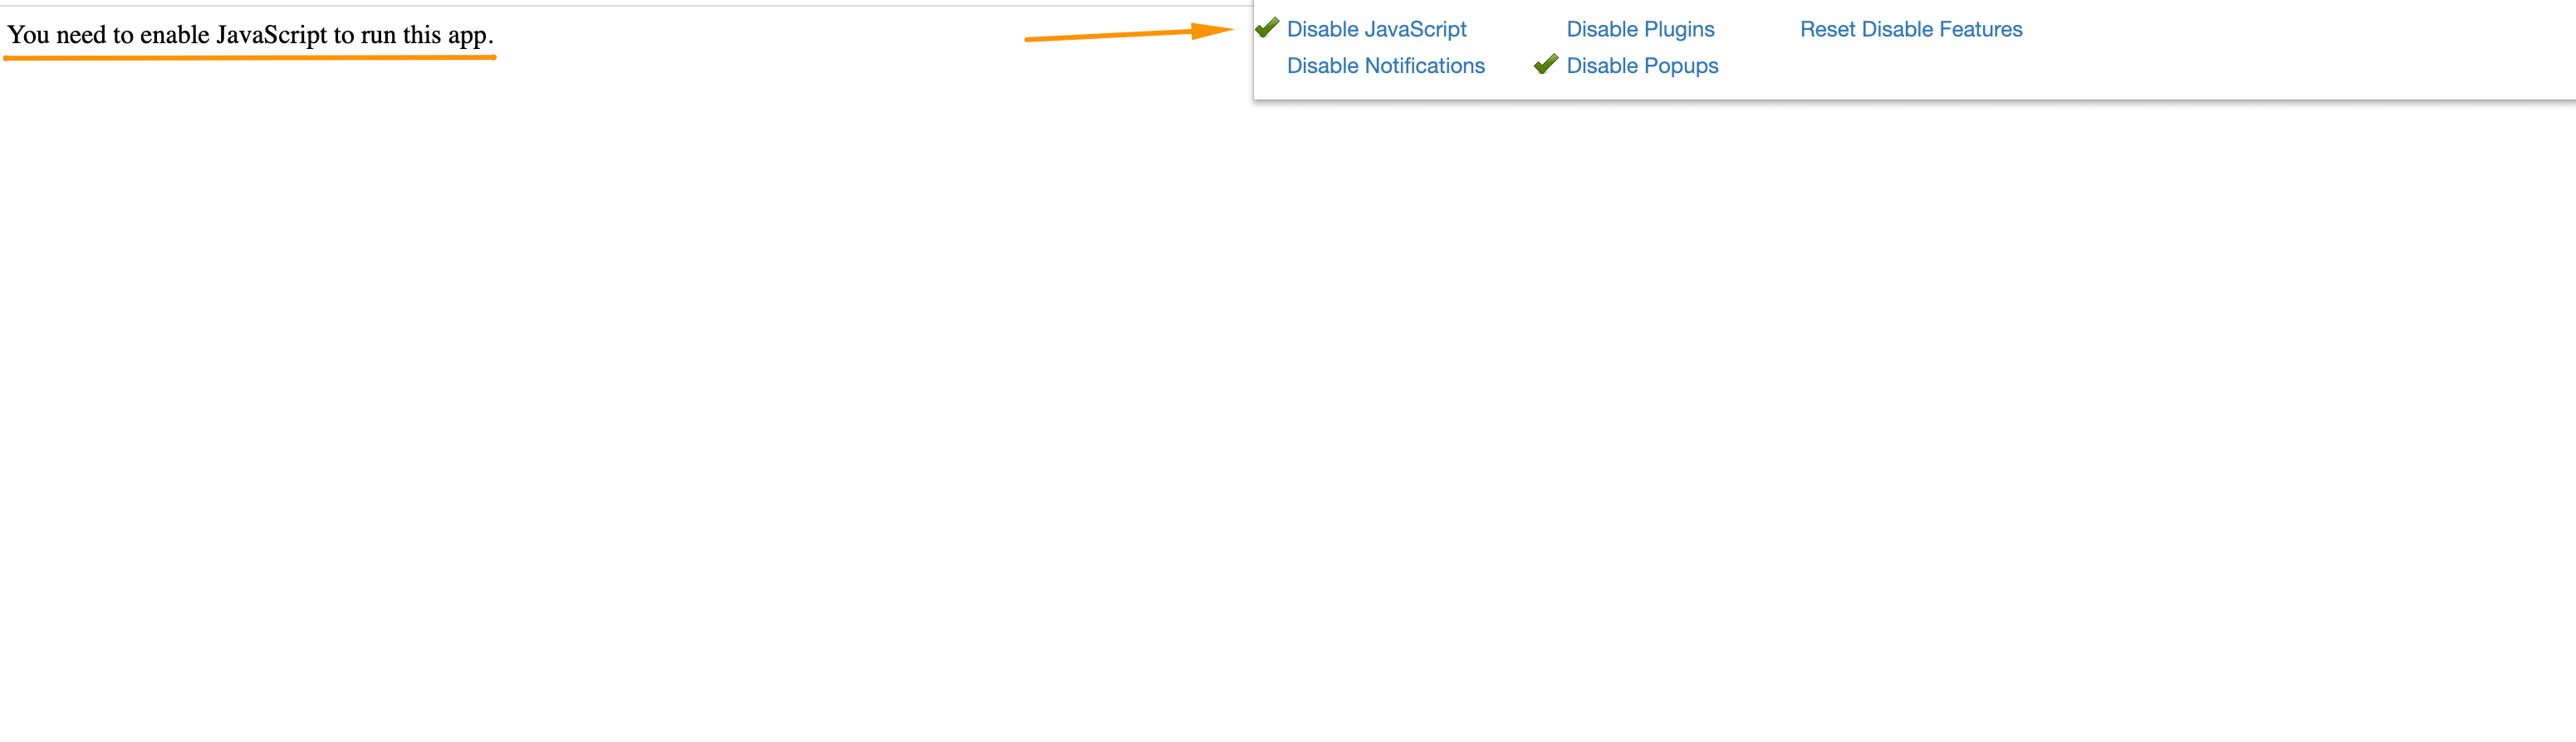
Once you do it, you’ll see how a page would look without any JS.
In the example above, you can see that no content is available without JavaScript.
Note that this method just gives you an overview of how much JavaScript influences content delivery. It does not tell you if Google will index it or not.
Even if you see a blank page like above, it doesn’t mean that nothing’s working. It just means that a website heavily relies on JavaScript.
That’s why you need to test the rendered HTML with the tools I’ll show you in the next step.
Step 2: Check if Googlebot Is Served the Right Content and Tags
Google Mobile-friendly Test Tool
Google’s Mobile-friendly Test Tool is one of the best and most reliable tools when it comes to checking mobile-rendered HTML because you get information right from Google.
What you need to do:
- Load the Mobile-friendly tool.
- Check your URL.
- Look at the info in the HTML tab:
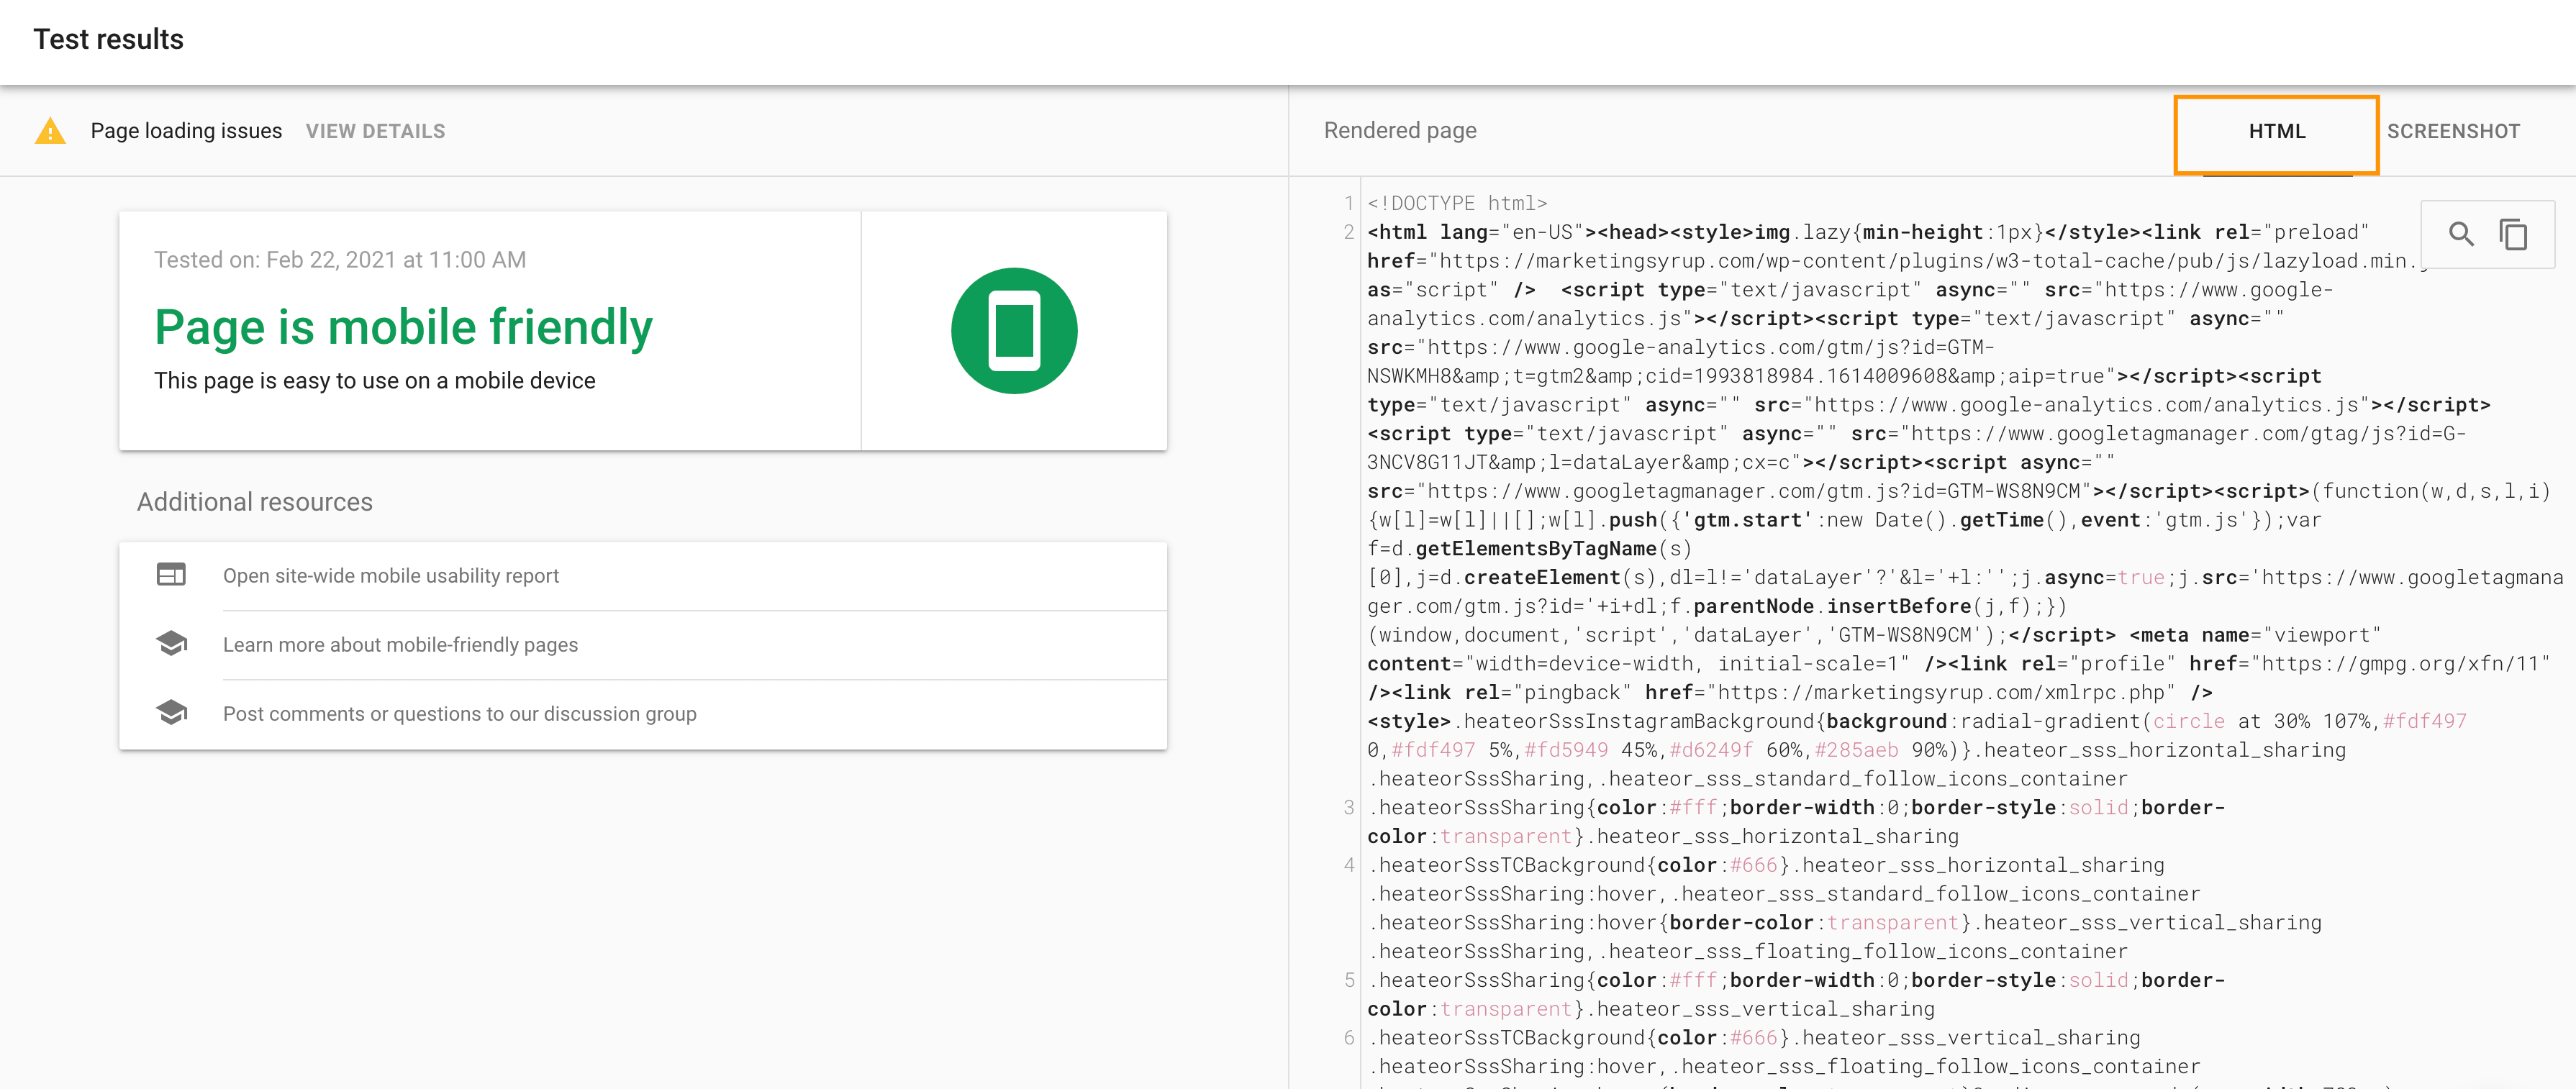
That’s where the technical SEO side comes in, as you’ll have to check the code to make sure it has the right information.
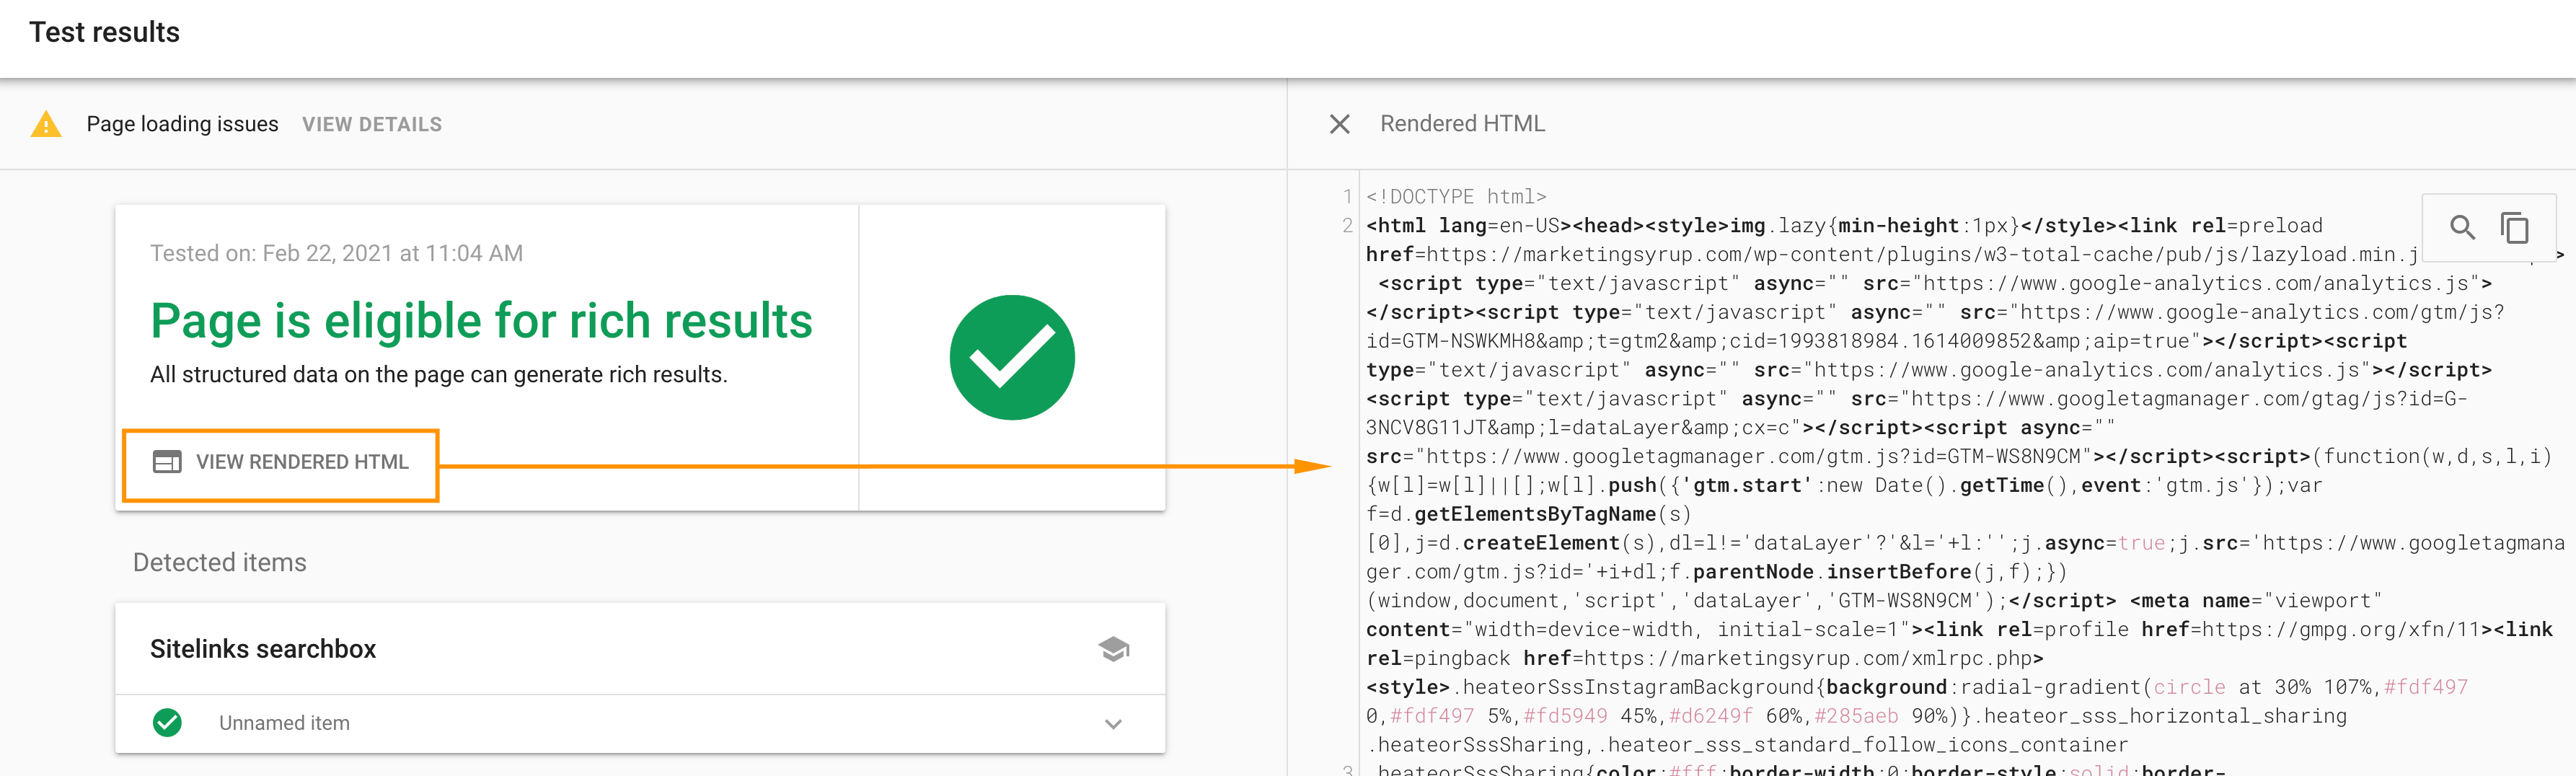
Note: you can use the Rich Results Test tool to do these checks, too:
 URL Inspection Tool in Google Search Console
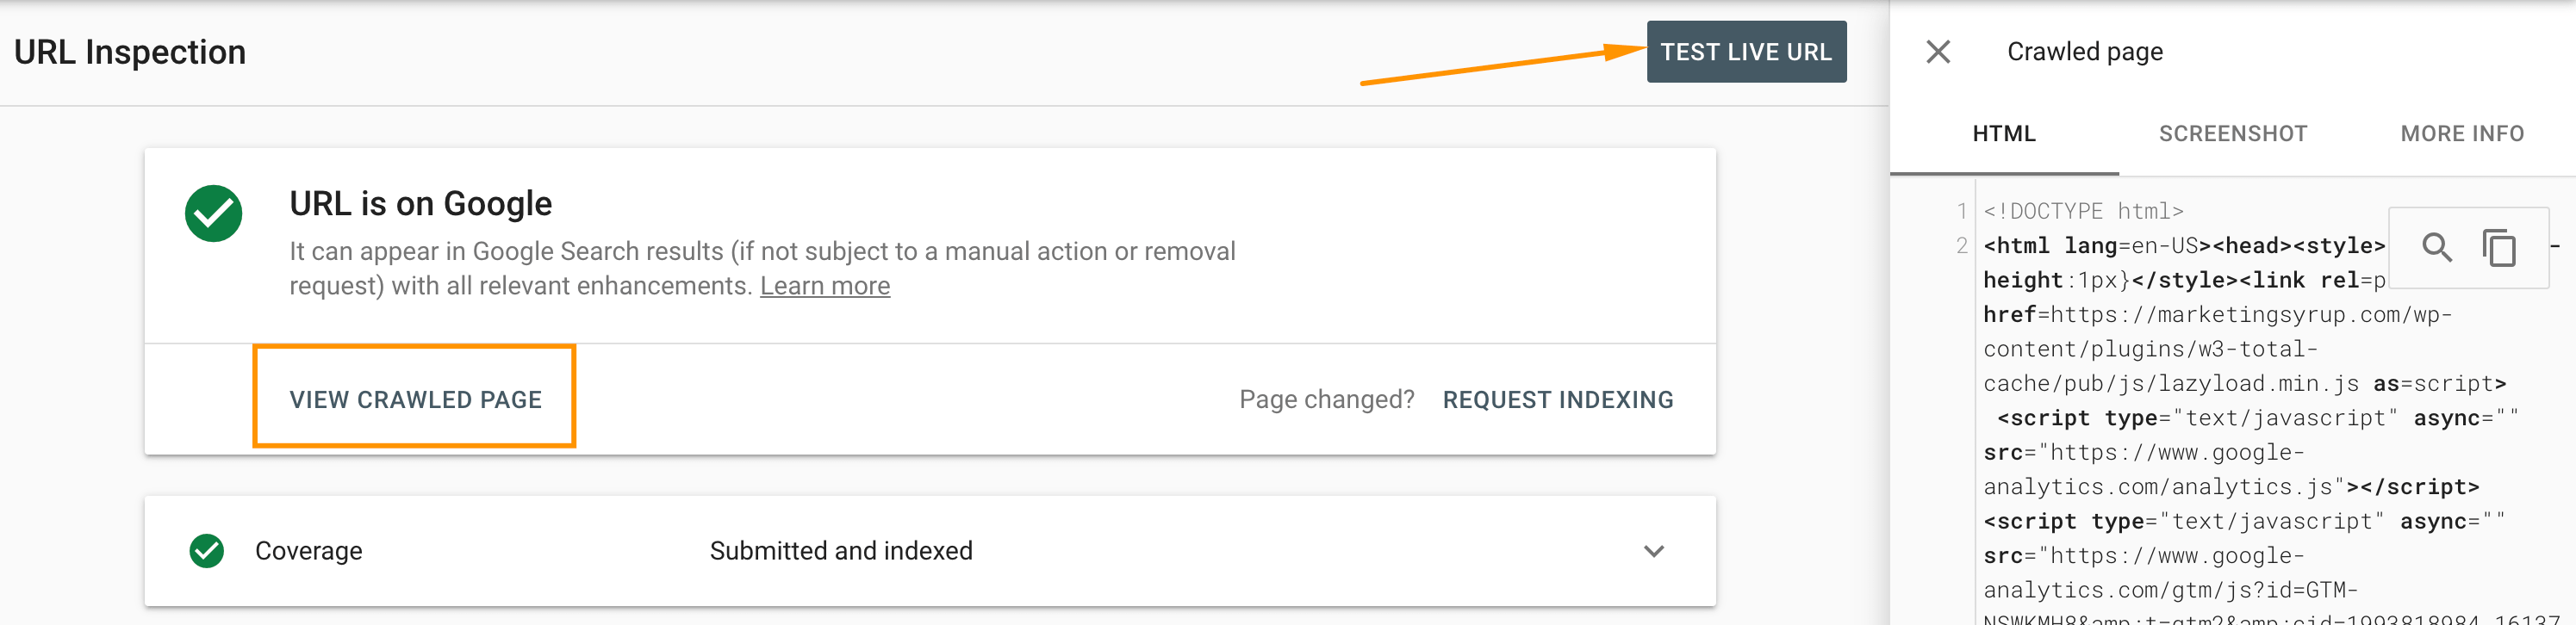
The URL Inspection tool also gives you access to the raw HTML of your page that Googlebot uses for evaluating your page content:
 The Mobile-friendly Test Tool vs URL Inspection Tool
Ok, so what’s the difference between these tools and which is preferred?
The short answer is that there’s no difference in the output since the Mobile-Friendly Test and URL inspection tool use the same core technology.
There are some differences in other aspects, though:
- To use the URL Inspection Tool, you need to have access to the Google Search Console of the website you’re checking. If you don’t have such access, use the Mobile-Friendly Test (or Rich Results Test).
- The URL inspection tool can show you two versions of the same page — the last crawled version and the live version. It’s handy if something has just been broken by JavaScript and you can compare the new implementation to the previous one.
The Mobile-Friendly Test and Rich Results Test give you the output for your current live page version only.
Other Debugging Tools
View Rendered Source Chrome Extension
I love this extension as it shows the difference between the source code and rendered HTML. It gives you an overview of what JavaScript changes on the page:
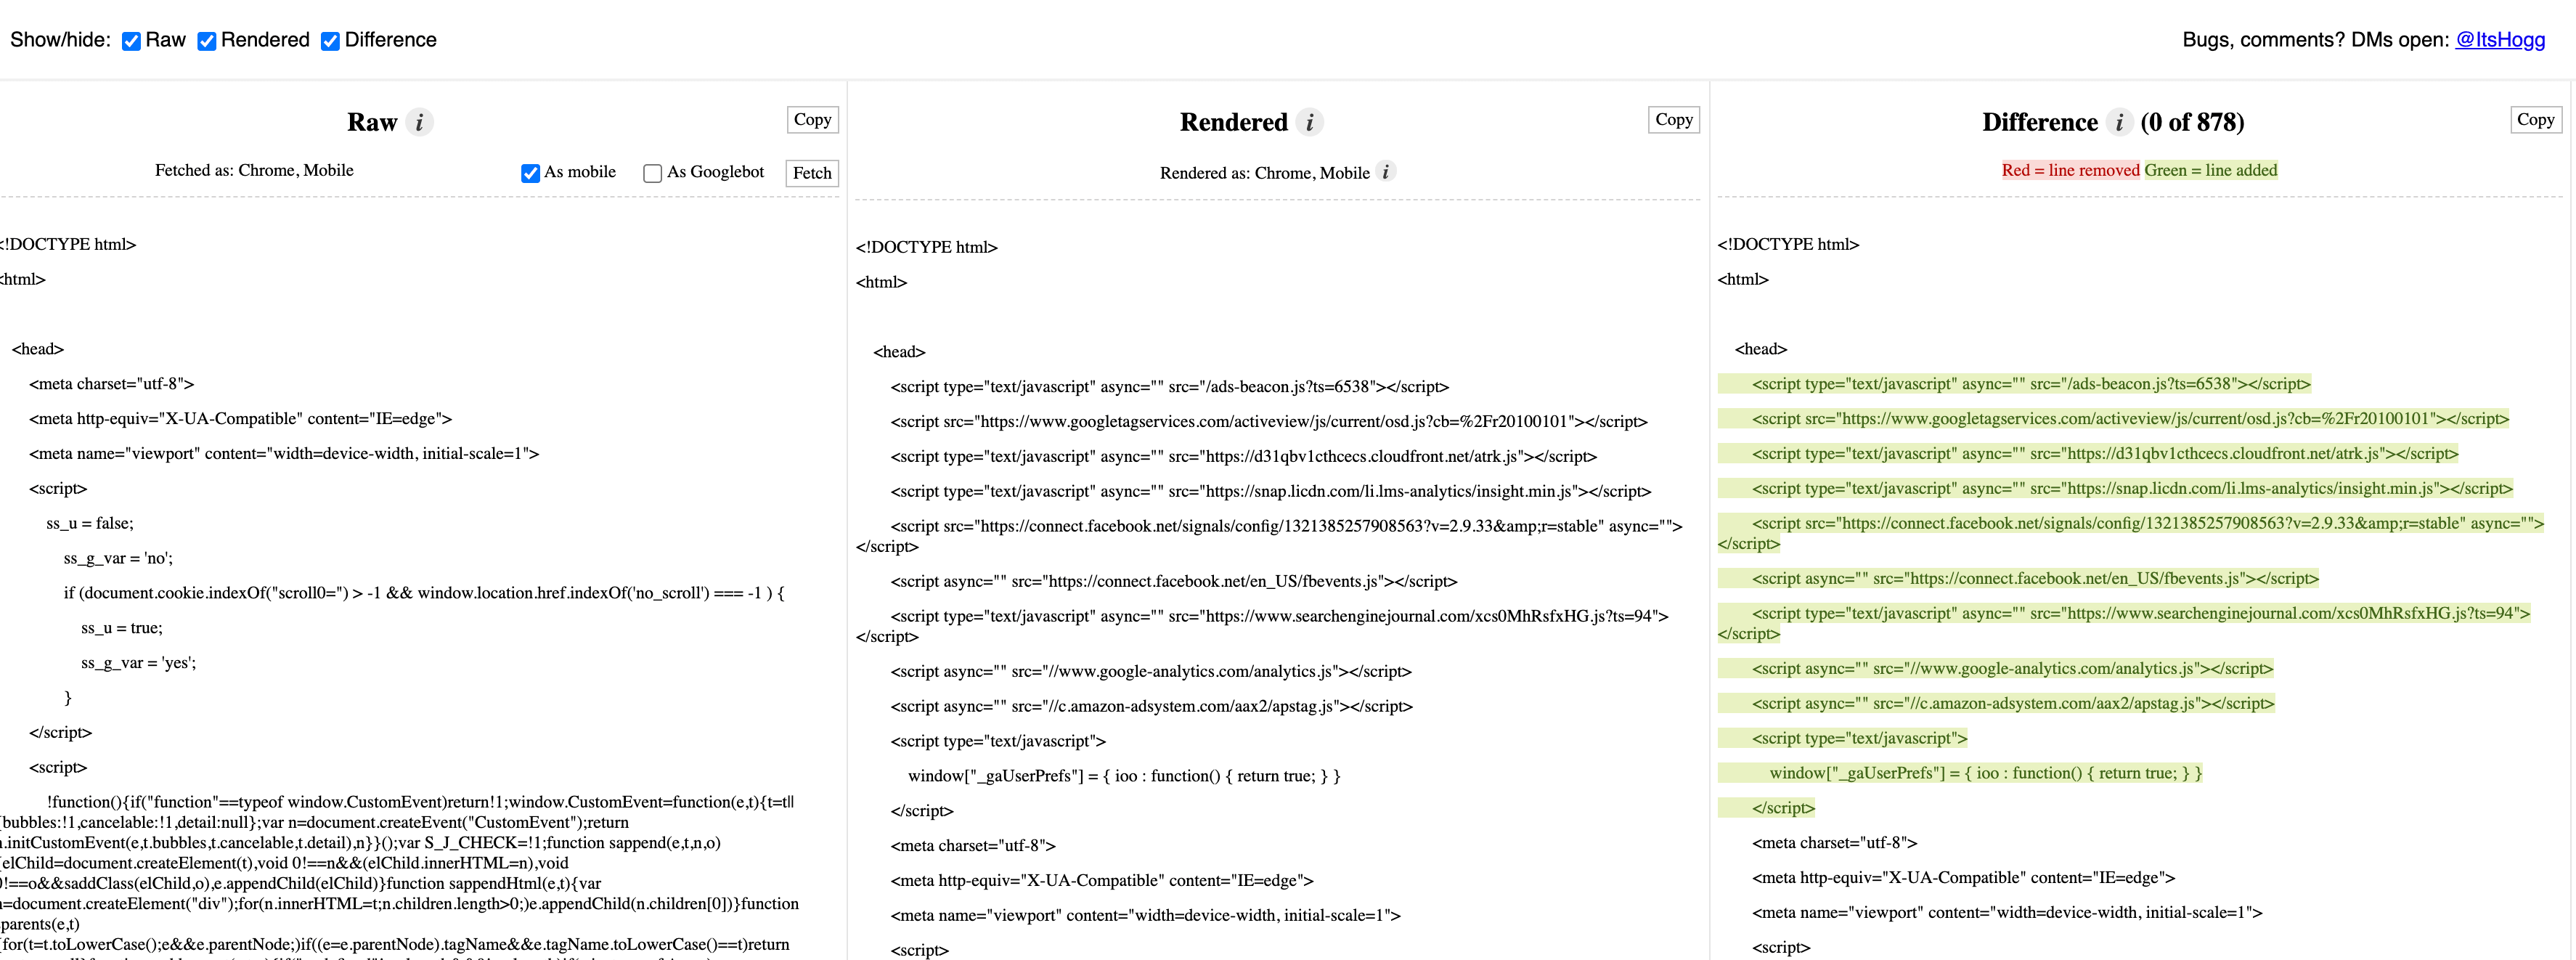
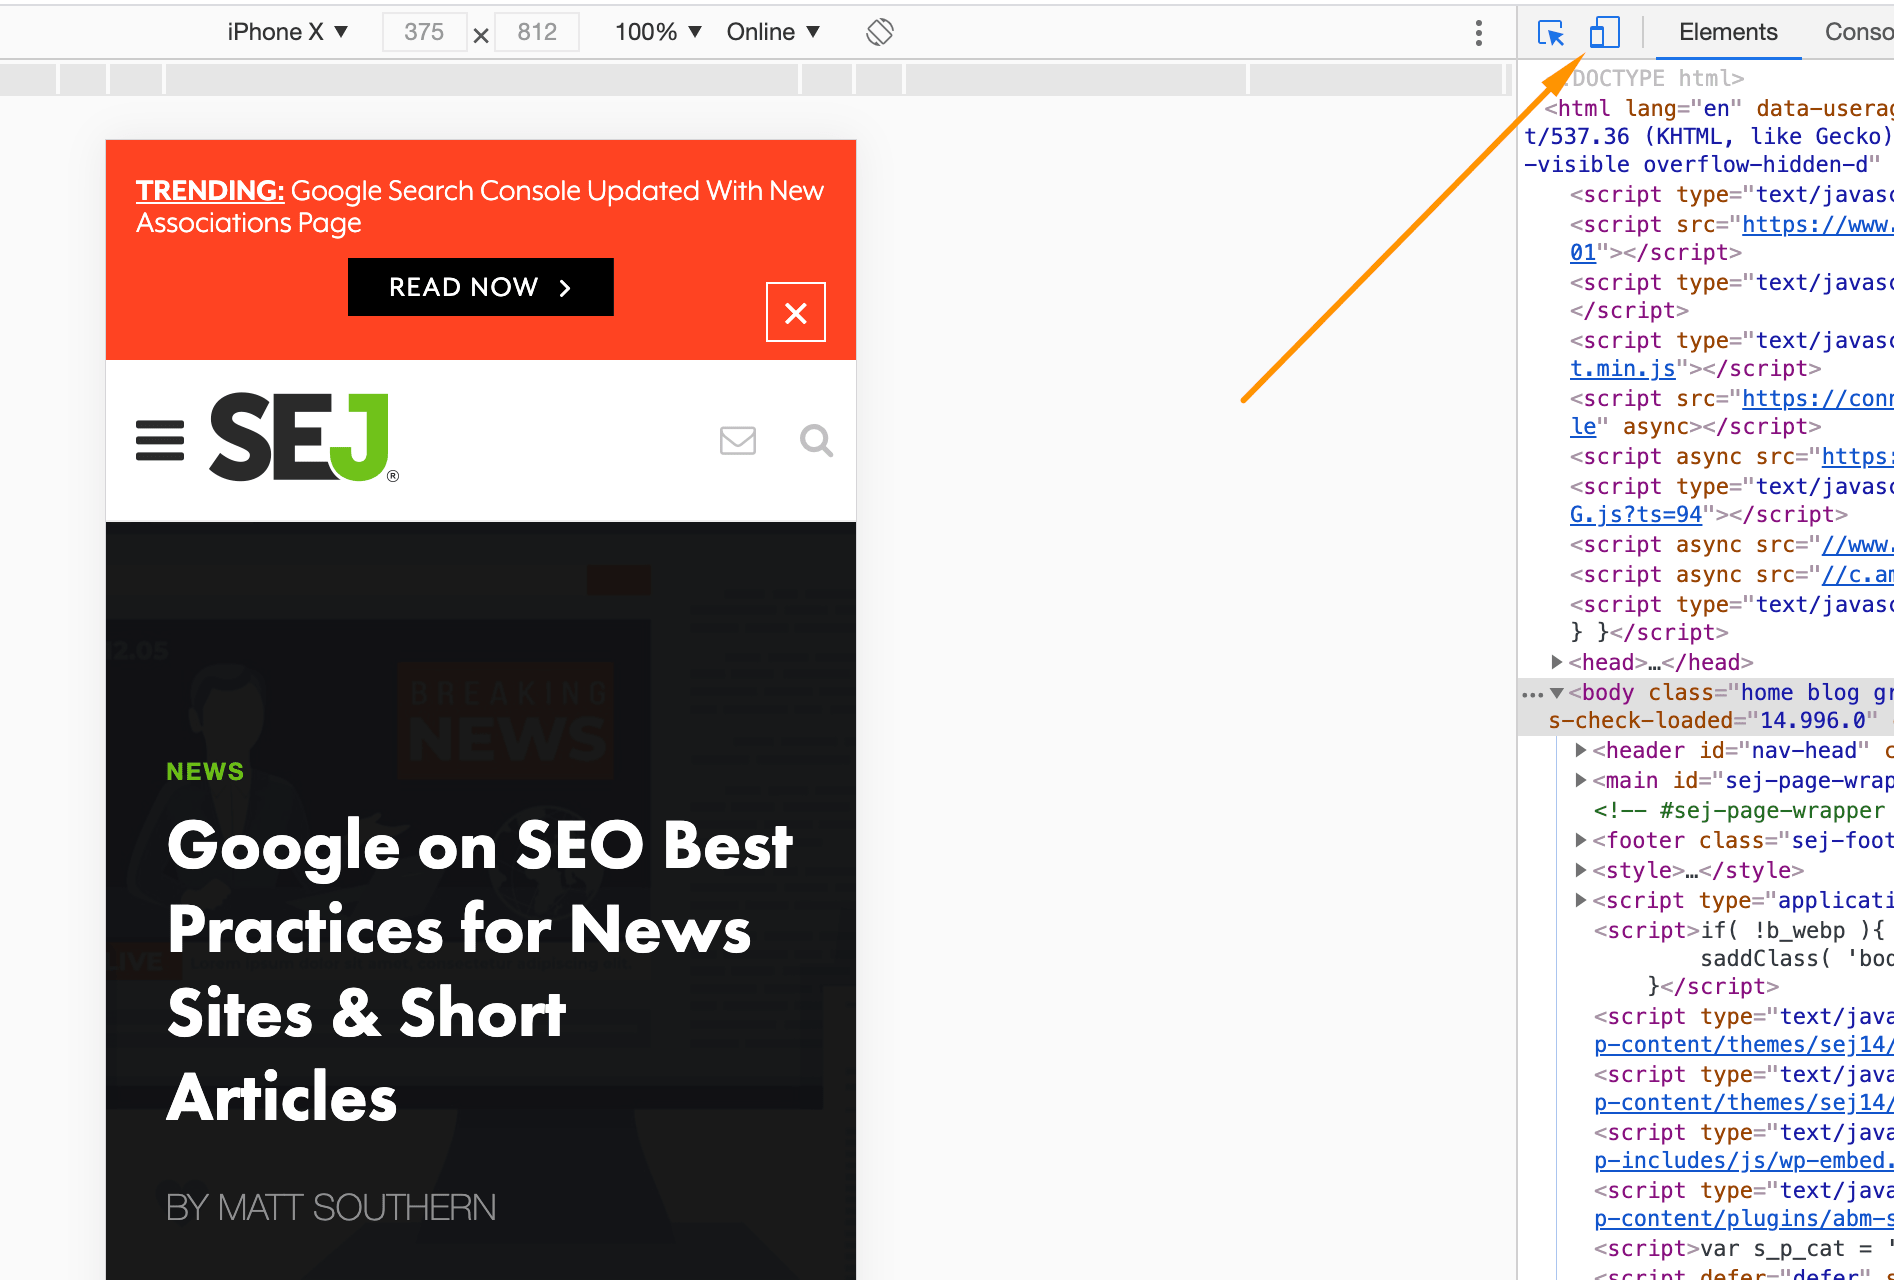
Note: Make sure you check mobile rendered HTML vs desktop.
To do this, you need to first load a mobile view in the Chrome inspection tool and then use the View Rendered Source extension:
 JavaScript Rendering Check
I think this is the most user-friendly JS debugging tool as you don’t even need to check the code.
It checks the main elements in the page source code for you and compares them to the same elements in the rendered HTML (again, make sure to check the mobile version):
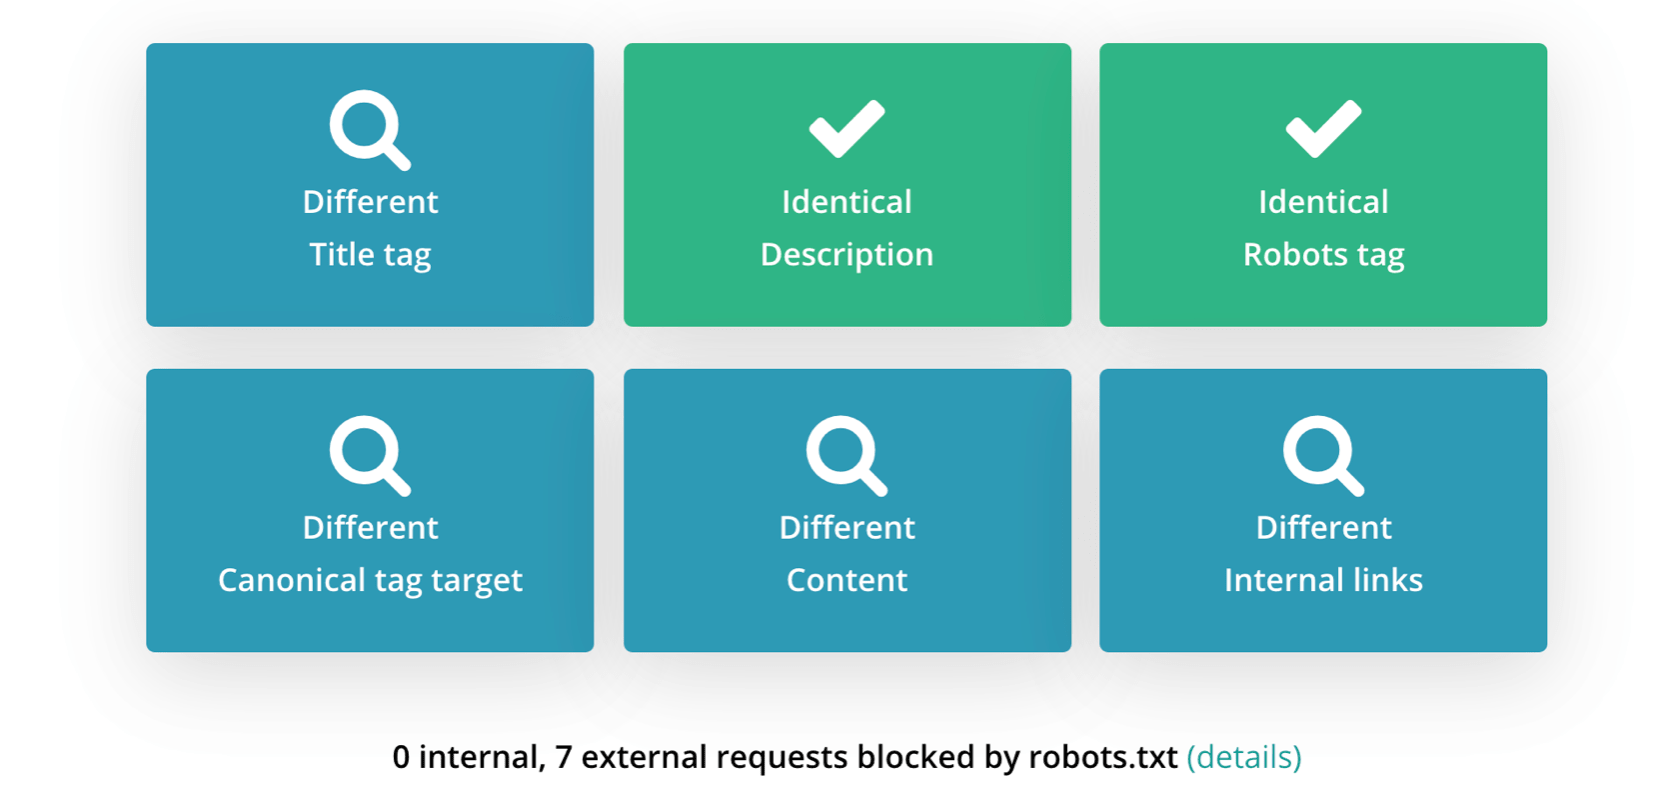
In this example, I see that JavaScript changes the main elements on the page such as the Title Tag, canonical, internal links.
It’s not always a bad thing but as an SEO professional, you’ll need to investigate whether these changes harm the page you’re checking or not.
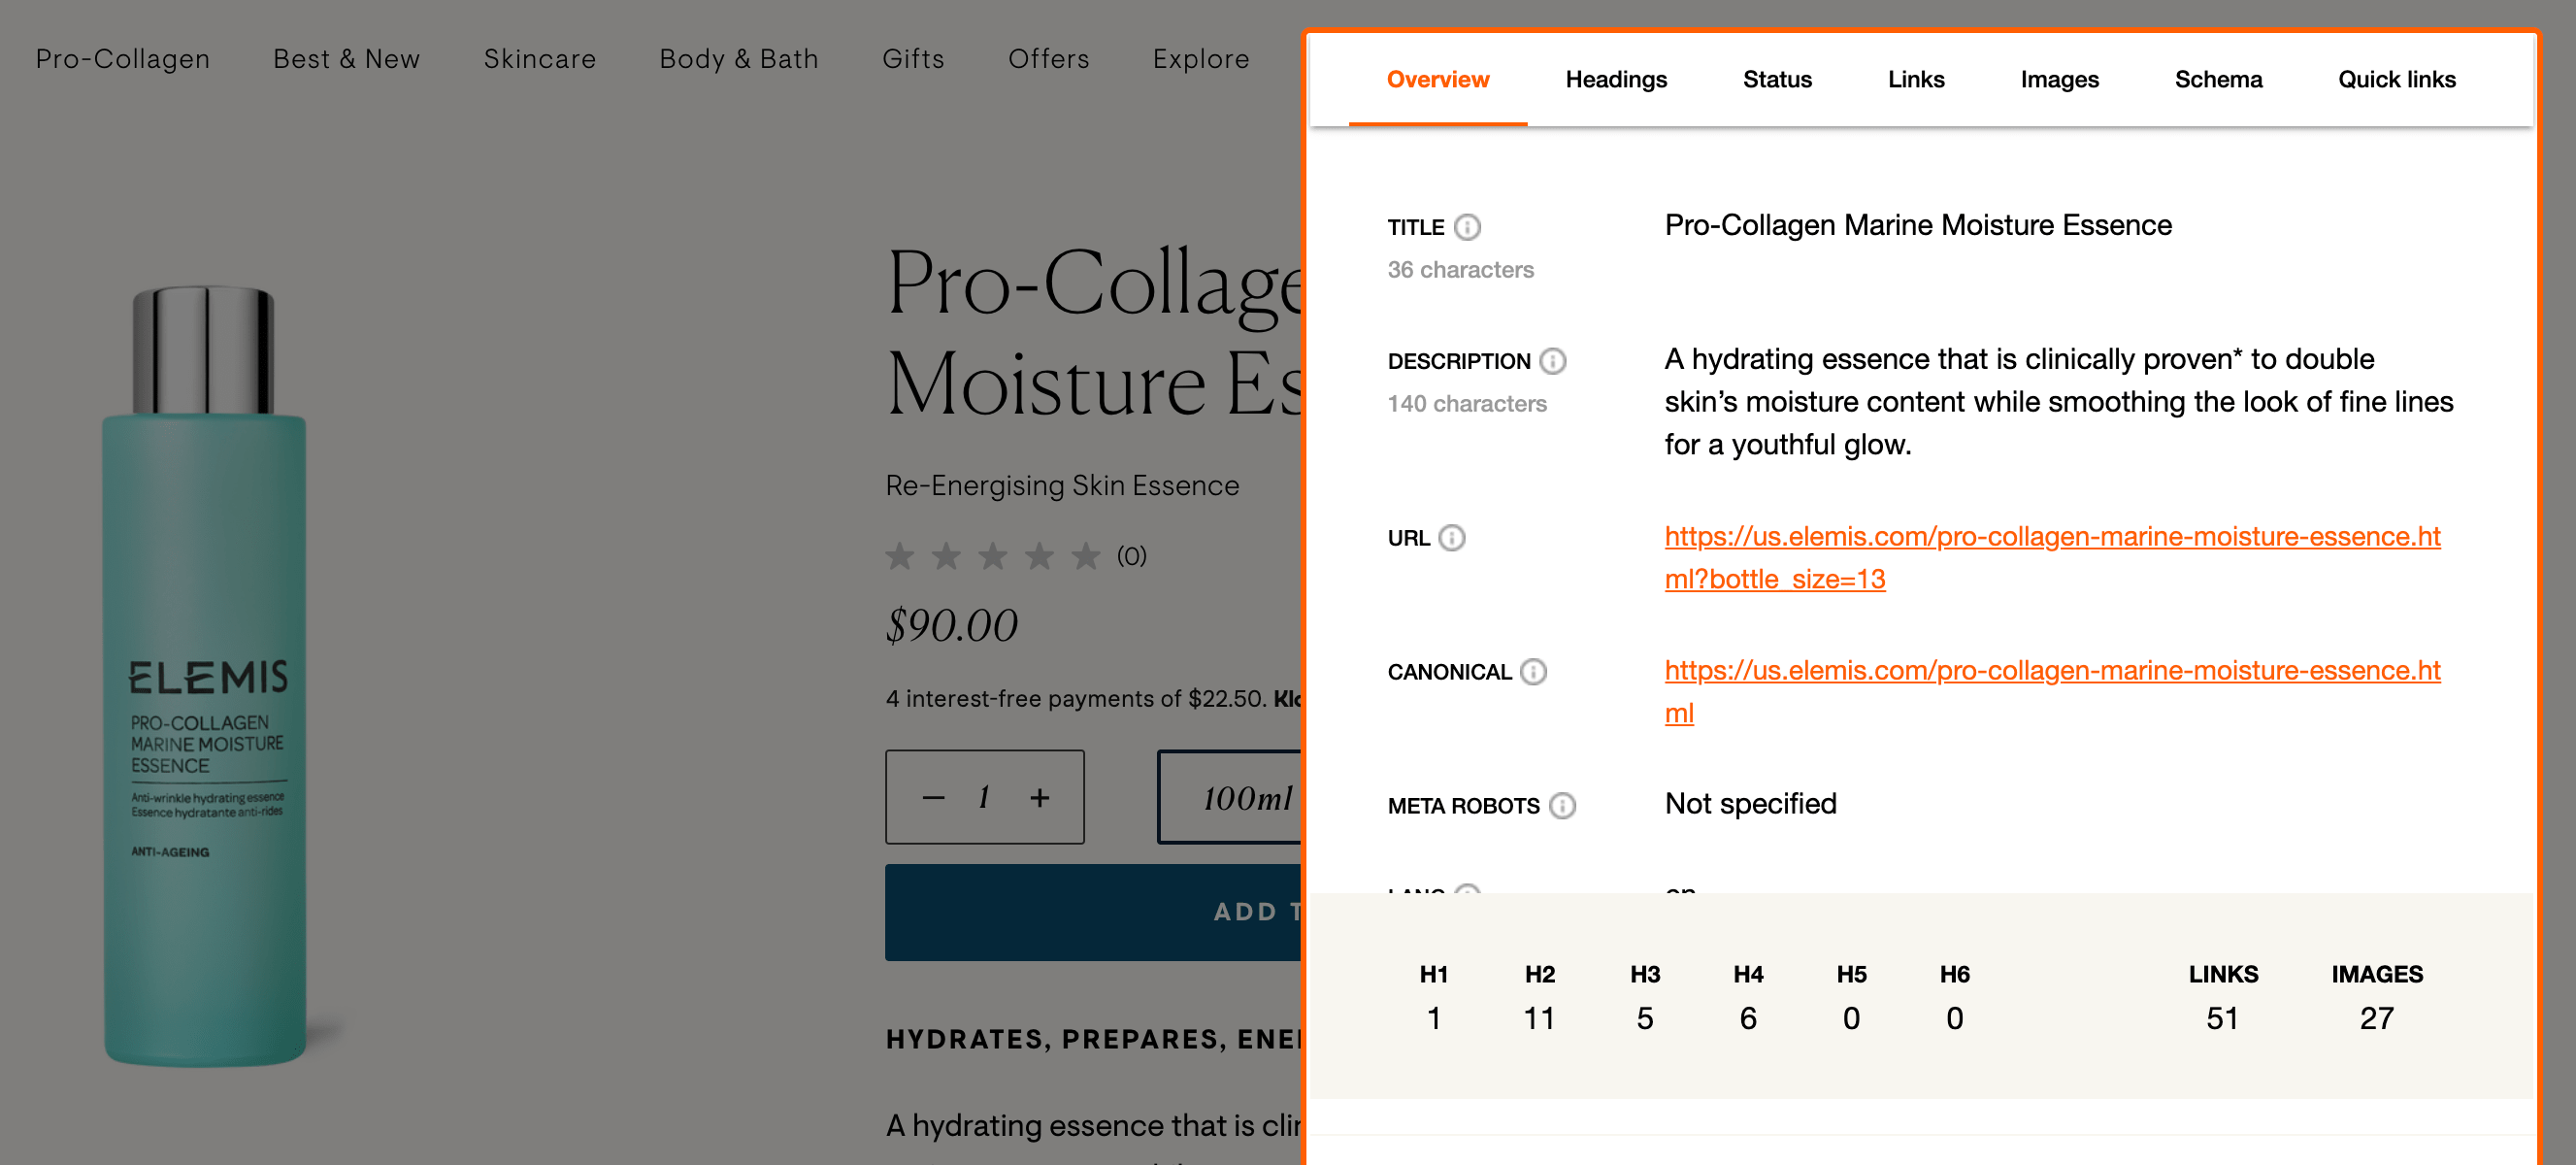
You can also use the SEO Pro extension to see the Title tag and other important tags found in rendered HTML, not source code:
I prefer using a combination of the tools mentioned above to investigate JavaScript SEO issues or ensure that best practices are implemented.
javascript redirect seo
Using JavaScript redirects generally goes against the best practices of SEO. Here’s why:
- From the UX perspective, other methods of redirecting are faster because they’re executed server-side.
- It’s very unlikely that all ranking signals collected by the search engines are passed to the new URL just like they are when you use a 301 or a 302 redirect.
- During the indexing process, Google’s algorithm may decide not to render JavaScript if it doesn’t significantly change the page, which means that your JavaScript redirect might not be executed.
- Using JavaScript redirects may slow down the crawling and indexing of your website by Google – rendering JavaScript is an extra step in the indexing pipeline.
These problems disappear if you use a server-side redirect like a 301.
So why would you ever want to use JavaScript to redirect your users if it isn’t SEO-friendly?
Why use JavaScript to redirect?
Contrary to what you may have heard, using JavaScript is a viable way of redirecting your users to a different page. But it all comes down to the details.
Since JavaScript redirects are executed client-side, you have the option of adding additional logic to redirecting. For instance, you can detect the language your user’s browser is using and redirect them based on that.
One common example of a situation where a JavaScript redirect is a good method is when you require your users to log in on your website. After a successful login attempt, the user is redirected with JavaScript. If the login is unsuccessful, you may display an error message with JavaScript. All it takes to implement that is a simple if statement. Take a look at the following code:
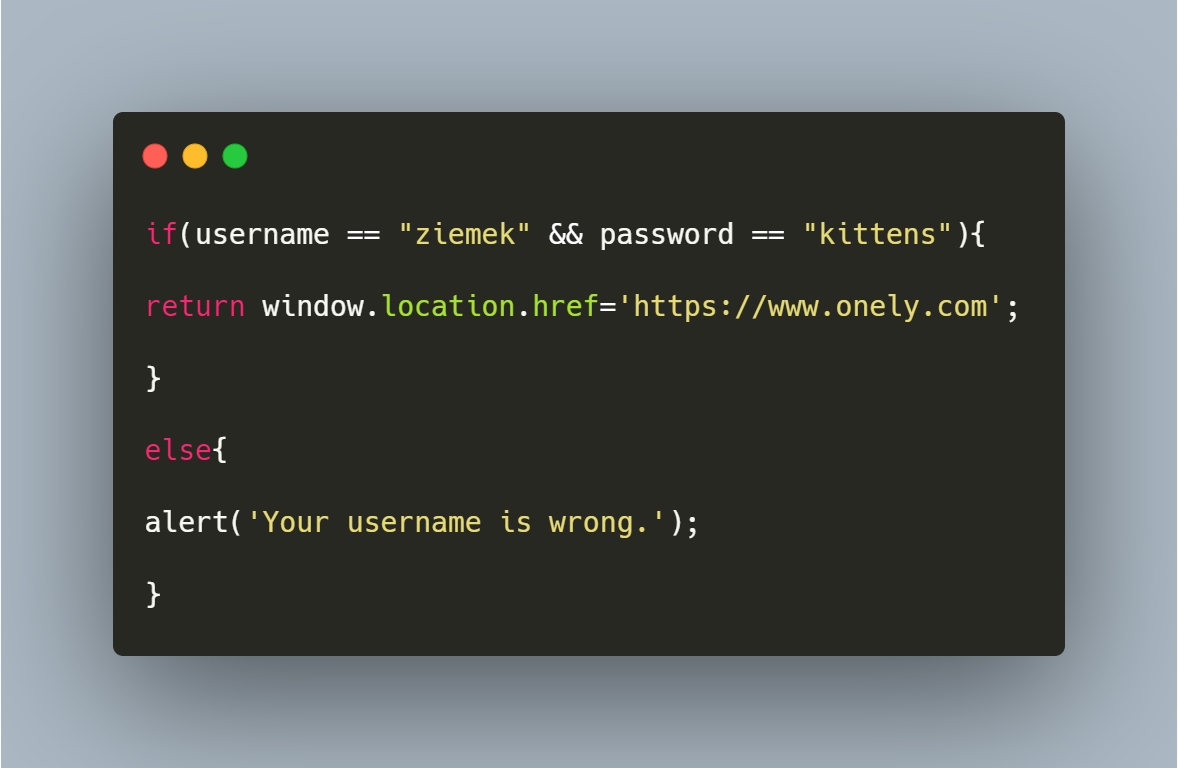
Of course, this is just an example. Don’t try this at home.
But it shows that JavaScript redirection can be a viable choice. You wouldn’t expect Google to crawl your internal pages that are only available after a successful login anyway. Plus, JavaScript lets you add additional logic to the redirection that you wouldn’t be able to add so easily with a server-side redirect.
JavaScript redirect methods
Contrary to the popular 301 and 302 redirects which are handled by the server, JavaScript redirects are executed client-side.
There are actually multiple ways to redirect using JavaScript. The most popular method is to use window.location.replace:
window.location.replace(“https://www.onely.com/blog/”);
You can give it a try in your browser. If you’re using Chrome, press Ctrl + Shift + I to open the Dev Tools, then navigate to Console, and simply paste the line of code above into the console and press Enter.
This will cause the browser to take you to the main page of our blog.
An alternative way is using window.location.href (or simply window.location, although there are minor differences between these two approaches). This is not an actual *method* in JavaScript; rather than that, it’s a property that you can use to store your current URL location. You can redirect the user to a different page by overwriting it like so:
window.location.href = “https://www.onely.com/blog/”;
The result will be the same if you just use it in the console, however, there’s a significant difference between using these two ways of redirecting on an actual page.
Avoid infinite redirect loops
When window.location.replace is executed on a given page, that page is not saved in the session history. So if you enter a page and get redirected, you cannot go back to that page by clicking the back button. You’ll be taken to a page you visited before that.
That’s not the case with window.location.href. Once you click back, the same page unloads yet again, your current URL location is once again overwritten, and you get redirected to the page you just wanted to leave. This is an endless loop. Keep that in mind if you’re thinking of using this redirect method.

Doing it right – 301 and 302 redirects
When a browser sends a request to download a given page, the server may redirect the browser to a different URL address if you instructed it to do that using a 301 or 302 Redirect command. These commands are stored in your server settings or in .htaccess files within your directories (if you’re on Apache).
This method of redirection is preferred by search engines. Google’s documentation is clear:
“If you need to change the URL of a page as it is shown in search engine results, we recommend that you use a server-side 301 redirect. This is the best way to ensure that users and search engines are directed to the correct page. The 301 status code means that a page has permanently moved to a new location.”
Wrapping up
While JavaScript redirects are viable in some circumstances, keep these things in mind:
- Most of the time, a server-side redirect like 301 or 302 is a better choice from the SEO perspective. You can be sure that when you use a 301, Google will always follow it, and it will pass all ranking signals to the redirected page.
- Be careful not to create an infinite redirect loop with window.location.href unless it’s absolutely necessary and won’t impact your UX.
- If you’re using JavaScript redirects to confuse Google and send your users to spammy content or malware, don’t. This goes against the Google guidelines.
To sum up, only use JavaScript as a redirection method when you have no other choice.
Conclusion
Let us know your thoughts in the comment section below.
Check out other publications to gain access to more digital resources if you are just starting out with Flux Resource.
Also contact us today to optimize your business(s)/Brand(s) for Search Engines